
Bathroom LED strip lighting: where to hide it so you see the light, not the strip
Good bathroom LED strip lighting looks as though the light is coming from nowhere. The niche glows, the vanity appears to float and a line of light runs beneath the bath, but you can’t see the fitting that creates it. The aim is to see the light and never the strip.
Where the strip goes matters as much as which strip you buy. One maker’s guide says the “mounting position and distance from an object determines the appearance”, which is why concealed bathroom LED lights need to be considered with the niches, tiles and furniture rather than added afterwards.
The electrical position matters as well. In bathroom zones 1 and 2, the minimum is IPX4, or IPX5 where water jets are present. IP65 is a product rating, not a universal requirement for every strip in a bathroom. All of this is fixed electrical work for a qualified electrician.
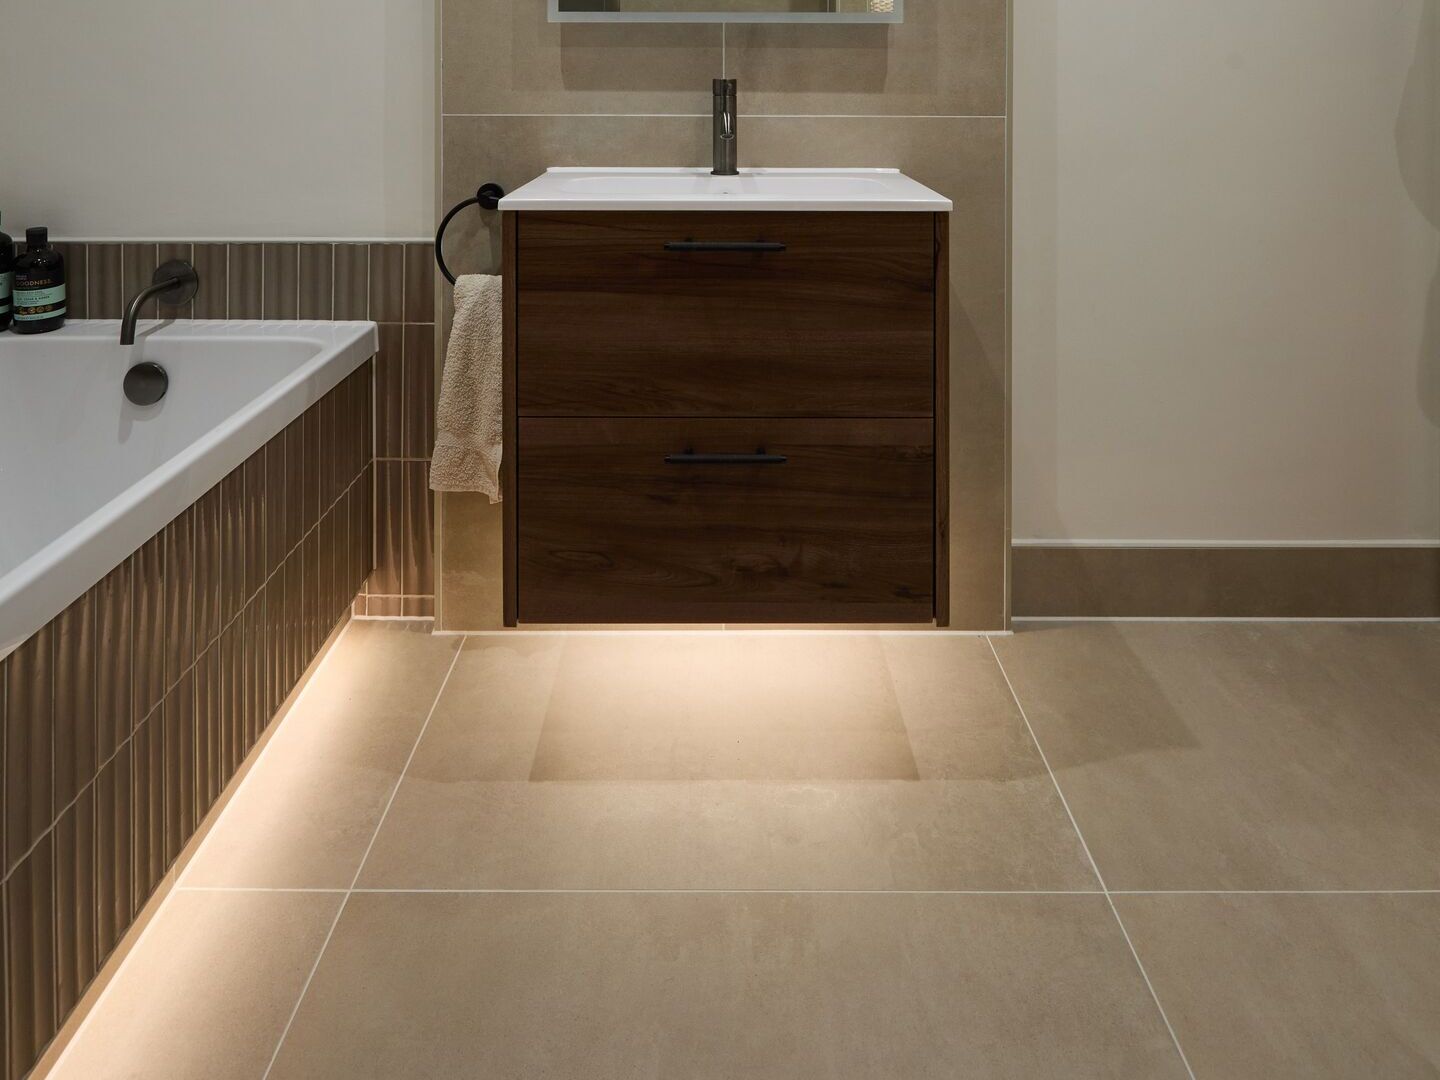
Concealed LED strip lighting is a low-voltage strip hidden in a recess, beneath an edge or inside an aluminium profile. The strip stays out of sight while its light falls onto another surface, such as the back of a niche, the floor below a vanity or the ceiling. It runs from a separate driver rather than directly from the mains, and the strip and its position must suit the bathroom zone.
Quick Navigation
Where to hide LED strip in a bathroom
Put the strip where the eye can’t reach it and let the light land on a surface. The usual hiding places are the head of a niche, the underside of a shelf or floating vanity, the base of a bath panel, beneath the nosing of a step, inside a ceiling cove and behind a feature panel or boxing.
Swipe across to compare all columns.
| Where | Where the strip goes | What you see | Check before it’s drawn |
|---|---|---|---|
| Shower niche or recessed shelf | Along the head of the niche, or under the front edge of each shelf | The back and sill of the niche lit, not the strip | Zone and IP rating; driver position; tile set-out |
| Floating vanity or wall-hung WC | Underside, in a profile | A wash of light on the floor | Floor finish reflections; control, such as a switch or sensor |
| Bath panel base, platform or step | In a channel at the base, or under the nosing | A line of light along the floor | Space under the bath and its zone; access |
| Ceiling cove or shadow gap | Hidden behind the lip of the cove | The ceiling or wall lit | Built in plasterboard at first fix |
| Feature wall, slatted panel or boxing | Behind the panel or along its edge | The texture lit from the side | Ventilation and access to the strip |
| Behind a mirror | Use a backlit mirror rather than loose strip | A halo around the glass | See our mirror guide |
“Where the strip goes” and “What you see” are Bowmans’ design views; the checks come from the sections below.
For lighting around the glass itself, see our bathroom mirror lighting guide.
It’s worth trying the strip in its intended position before it’s fixed. The maker’s advice is to “Check for reflections and shadows”. In our view, that’s particularly important with a gloss floor or polished tile, because a strip that’s hidden directly can still appear as a reflection.
For how concealed strip works with the rest of the room, see our luxury bathroom lighting design guide.
Shower niche lighting and recessed shelves
The best place for the strip in a niche is out of sight at the top, so the light washes down the back and across the sill.
In the Gosfield photograph, a strip runs along the head of each of the three niches and reads as one continuous line. The niches are “lit with a warm-white strip, so the veining glows rather than disappears”.
For a group of recessed shelves, a strip beneath the front edge of each shelf lights the shelf below. On shelves above eye level you look up at that strip, so in our view a diffused profile or a strip that doesn’t dot matters most there. The Chelmsford CM2 project uses “LED-lit niche shelving over the WC”.
A long niche normally needs one continuous-looking run. The Halstead wet room uses “warm IP67 recessed LEDs”, while at Great Notley “a full-width LED-lit niche runs through the shower”. Great Saling also uses lighting across a long niche. The electrical design still needs to account for the length: one maker warns that LEDs “furthest away from the driver” can become dim, so a long run may be split or fed from the centre. That is for the electrician to work out, but it affects whether the finished niche looks evenly lit.
There are prefabricated options too. Crosswater offers a stainless steel niche with an optional LED strip at the back, and its data sheet lists a separate LED driver as a spare part. That immediately raises the question of where the driver will live. wedi lists Sanwell Top surfaces for its Sanwell LED niches 30/60, and a Sanwell Top LED power supply appears separately among its spare parts.
A niche inside a shower will almost always be in zone 1 or 2. The fitting therefore needs at least IPX4, or IPX5 where water jets are present, and the maker must confirm that it is suitable for that zone. The full requirements are covered in the bathroom lighting zones section.
For the dimensions, tiling and waterproofing of the recess itself, see our shower niche guide.
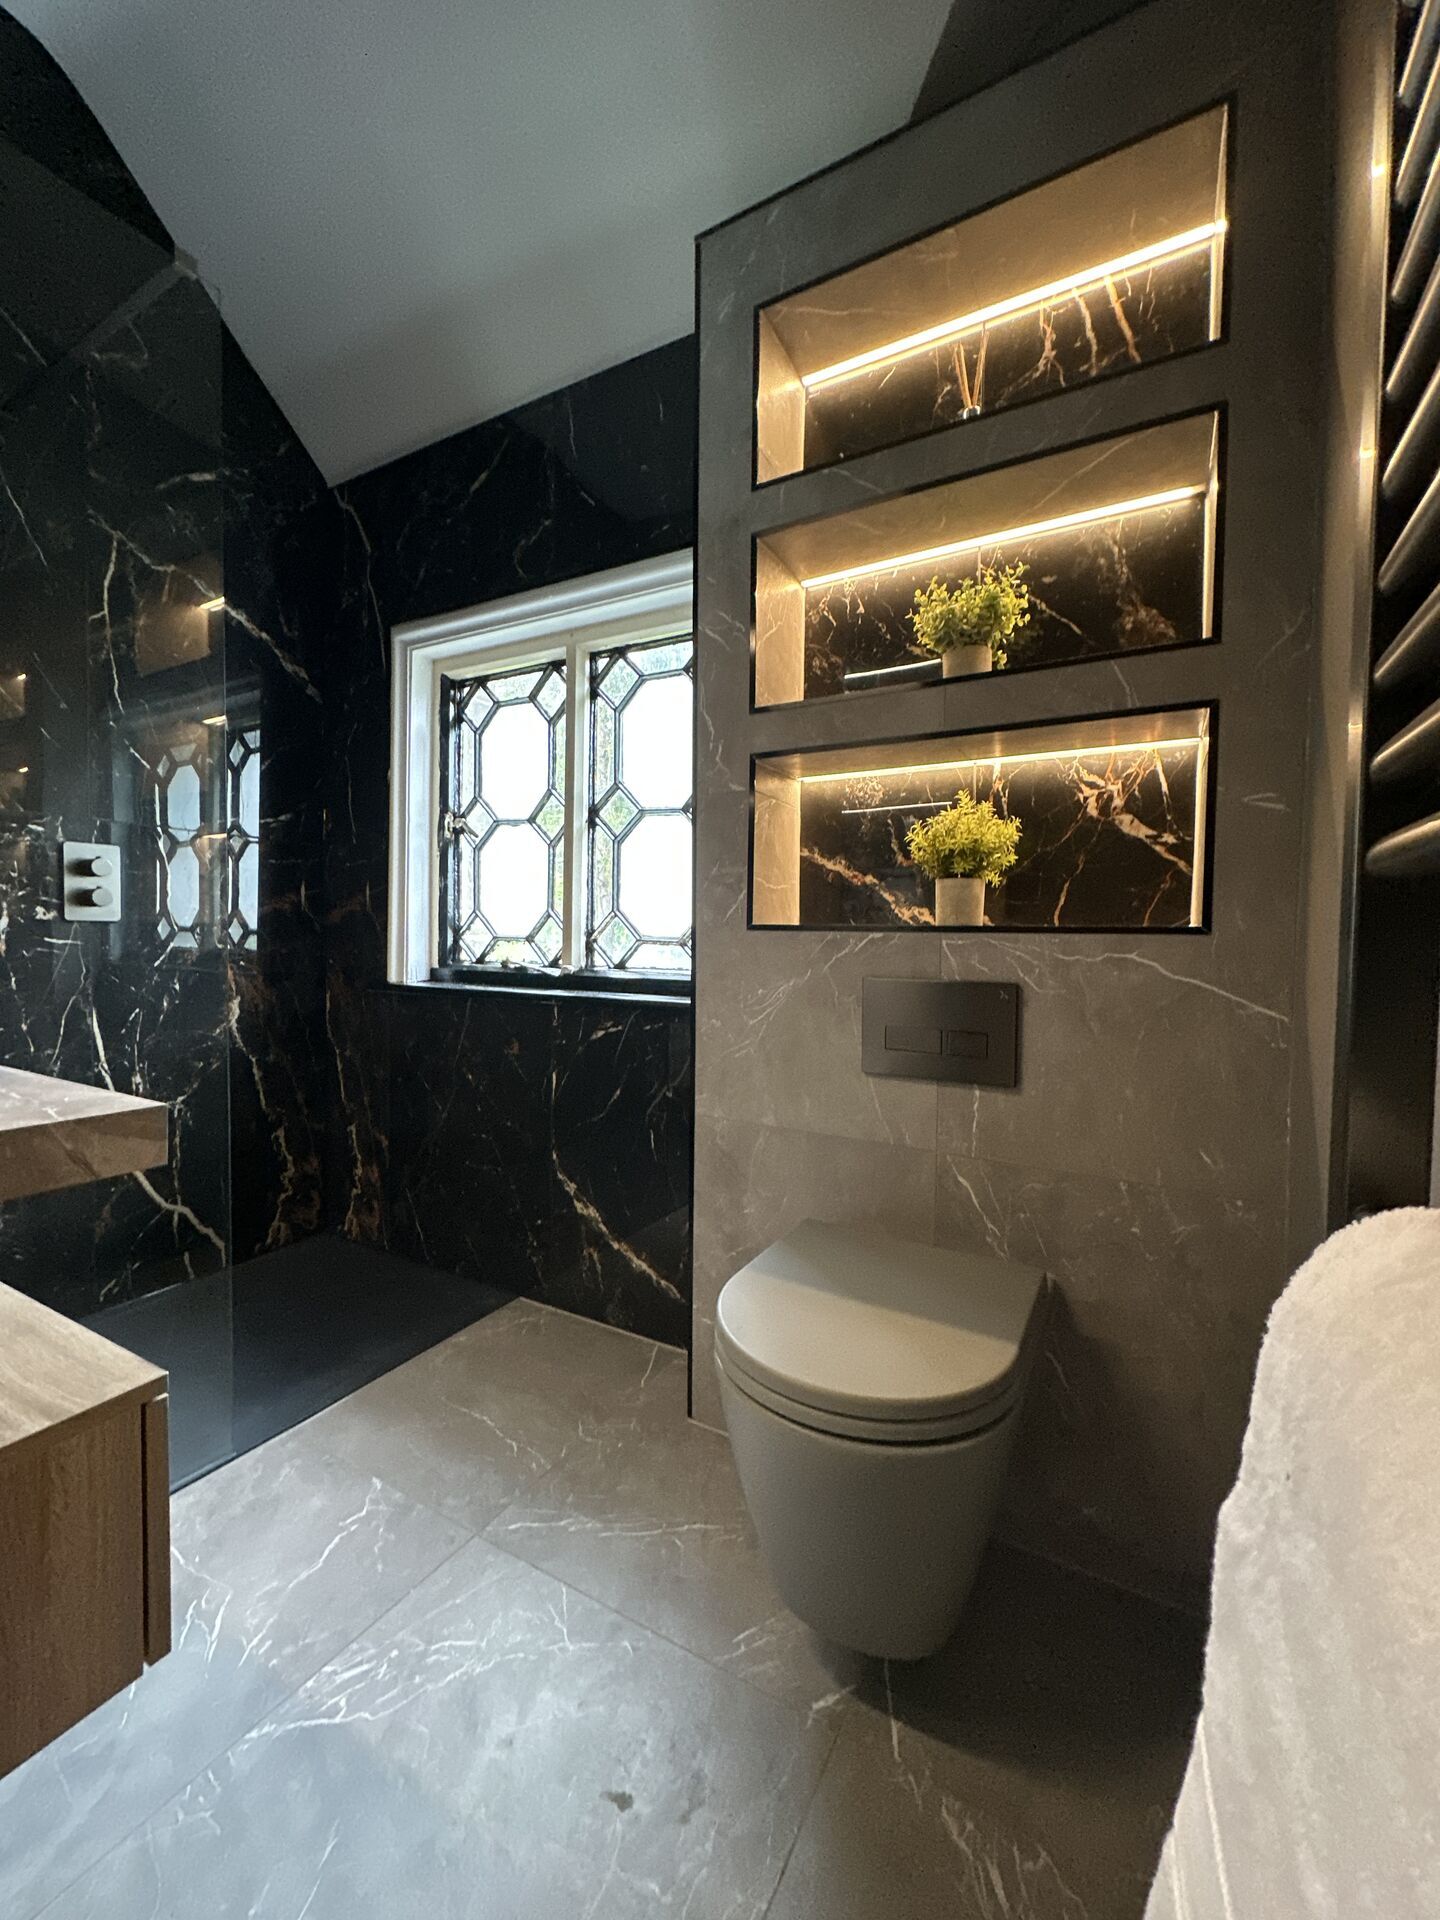
Decide the strip before the niche is framed. Draw the strip position, cable route and driver location with the niche. Once everything has been tiled, getting back to a poorly positioned strip can mean disturbing the finished tiles.
Under vanities, bath panels and steps
Low-level strip works when the light reaches the floor but the strip can’t be seen from standing height. The furniture, joinery or tiled edge needs to do the hiding.
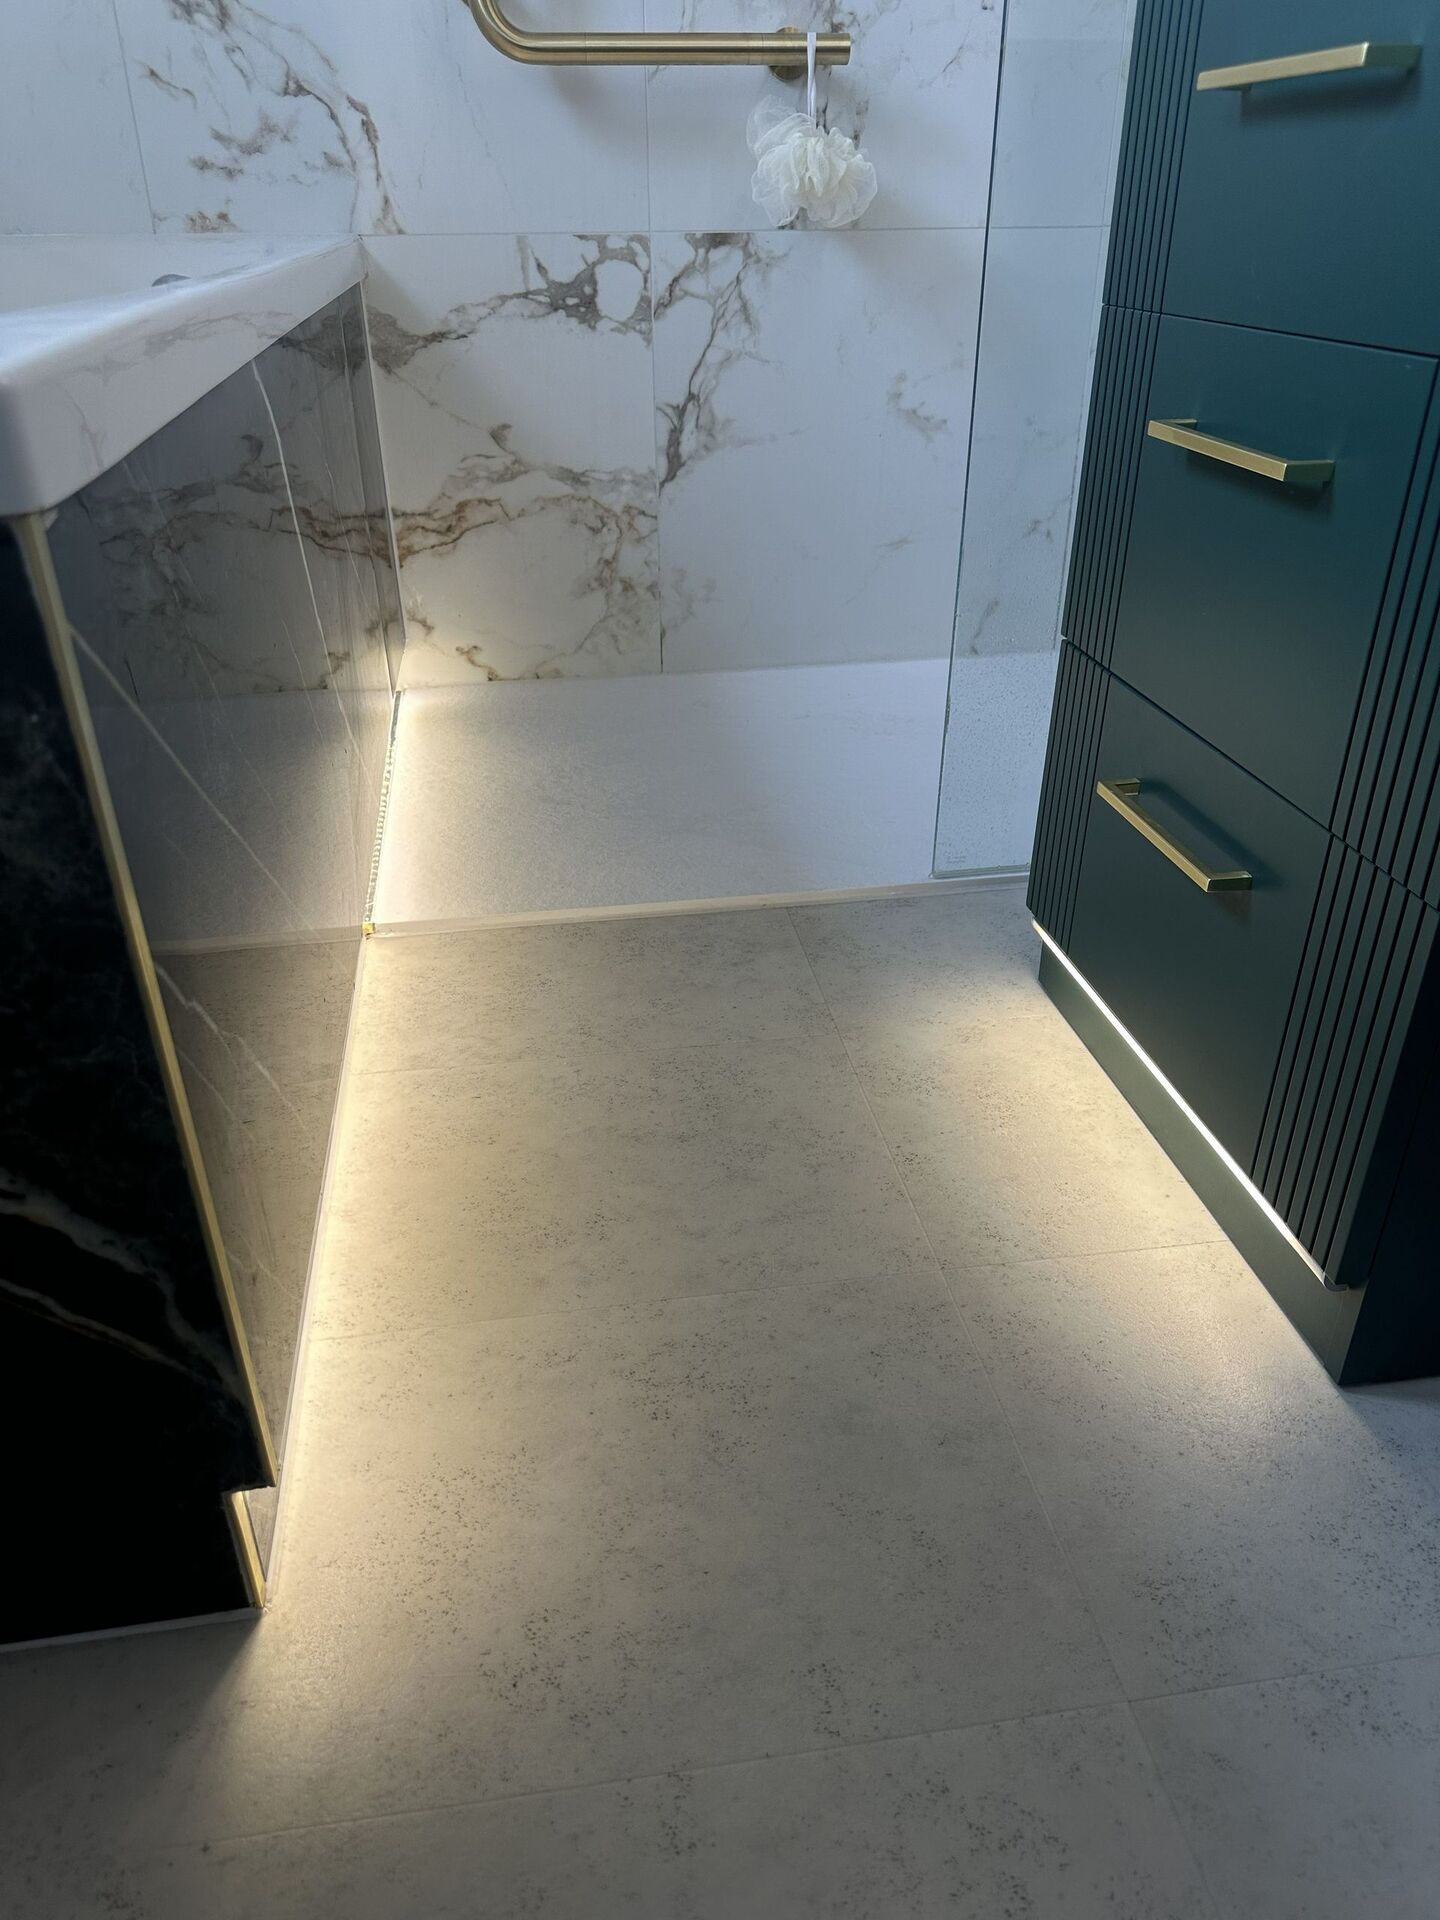
Under a floating vanity, we’d place the strip on the underside in a profile so it throws a wash of light across the floor. Chelmsford CM2 has a “Walnut Calypso vanity with LED underlighting”, while the Braintree CM7 wet room uses an “under-vanity LED strip” beside the wall-hung WC.
This is also a useful place for bathroom mood lighting. It gives you a low glow at night without turning on the ceiling lights. At Wickham Bishops, the project includes “an LED strip under the vanity on a sensor”. Our hotel-style bathroom guide explains that night-light idea in more detail.
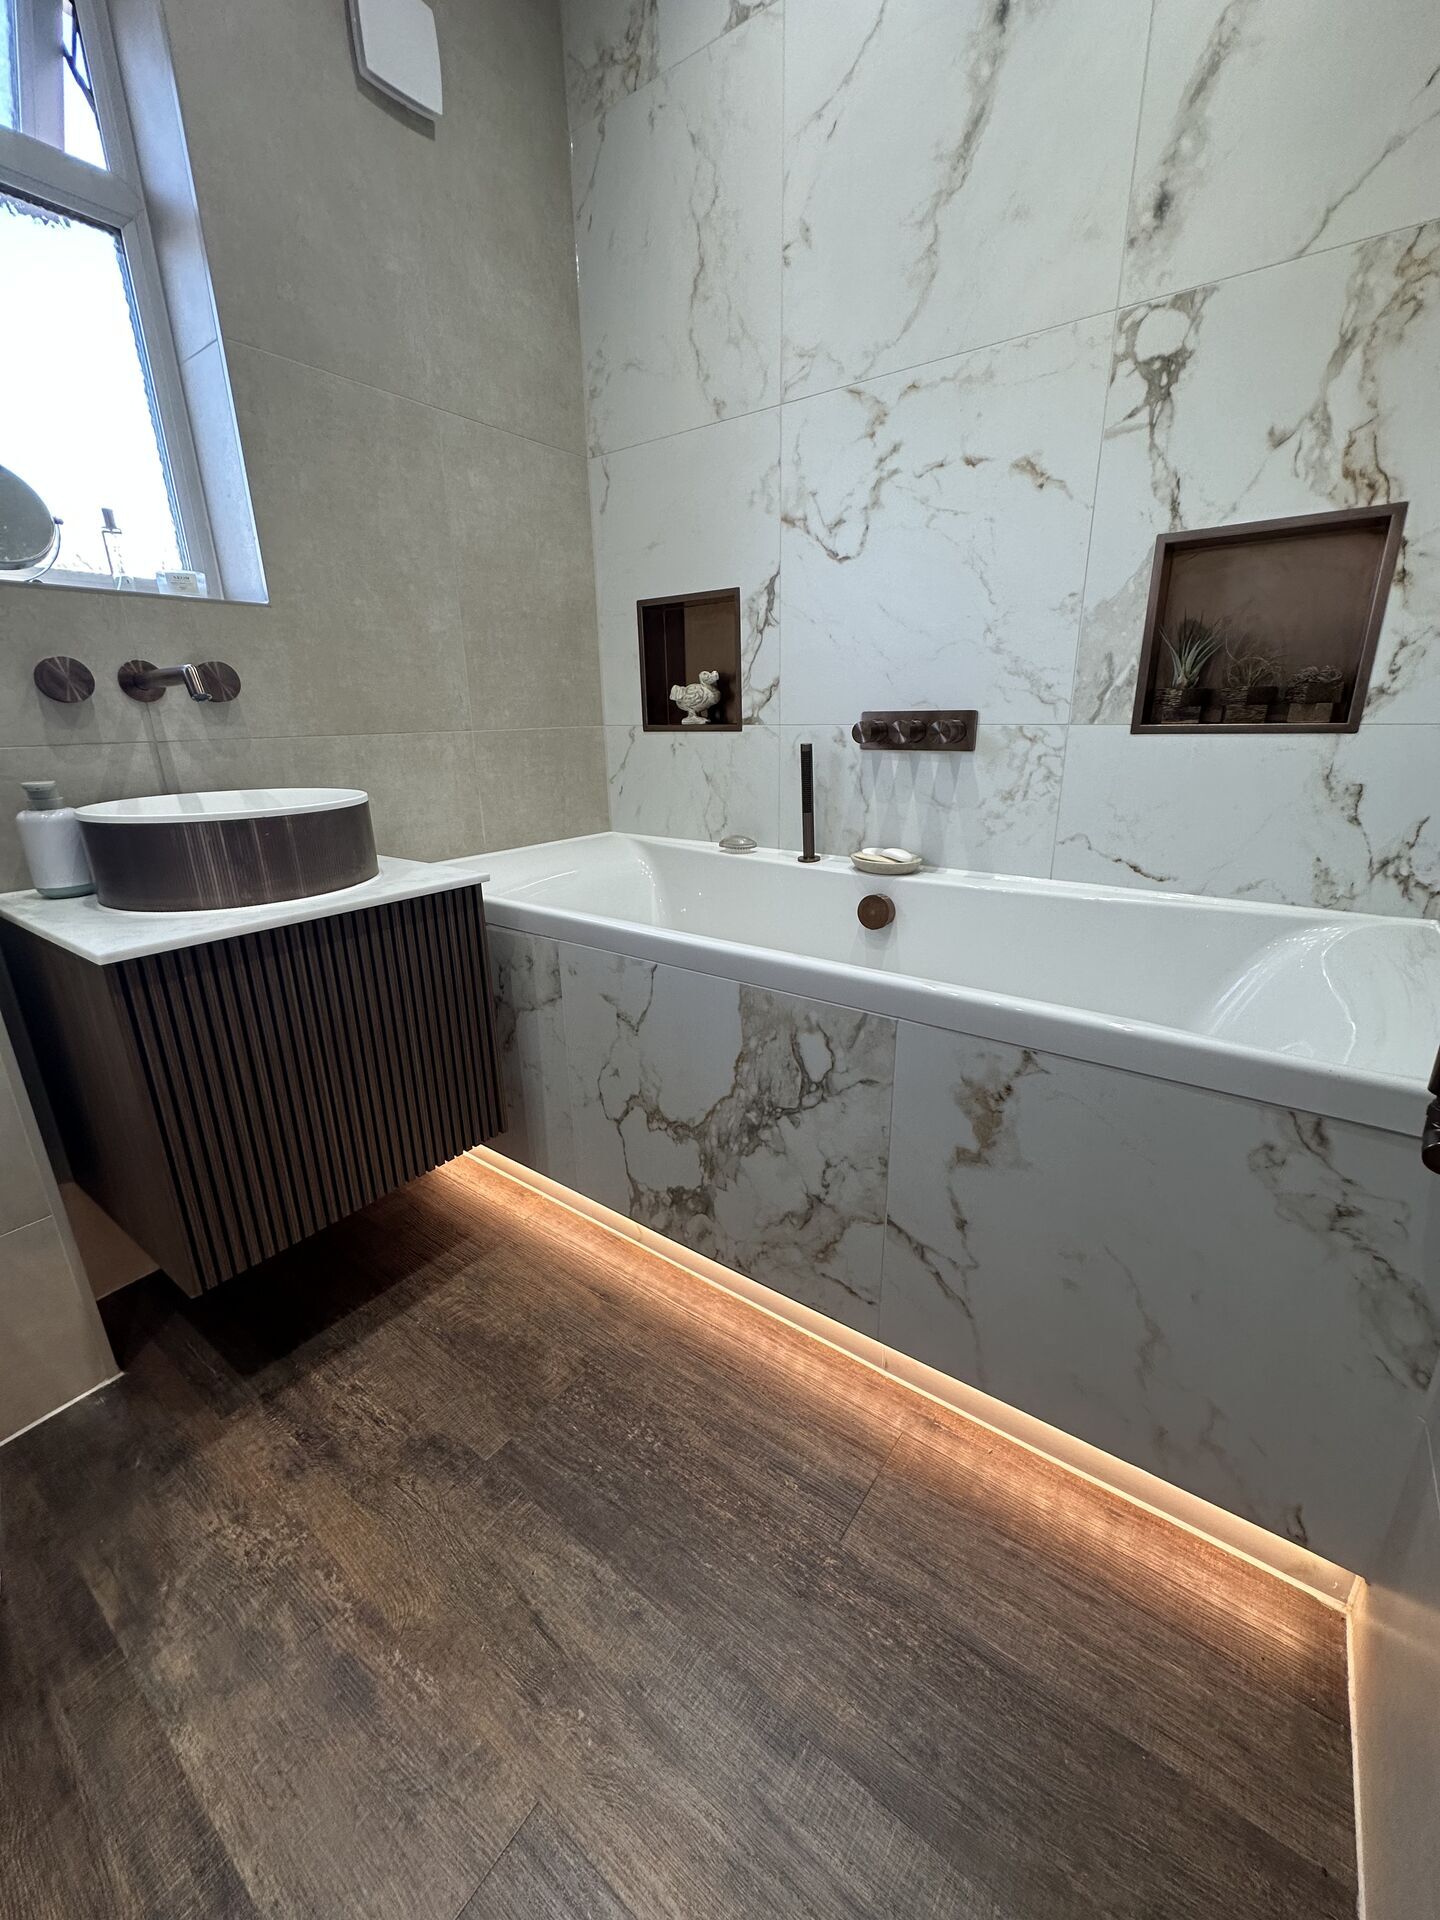
At the base of a bath panel, the strip can sit in a recessed channel where the panel meets the floor. The Braintree CM7 family bathroom uses exactly that detail, described on the project page as “A recessed LED strip where the bath panel meets the floor” and “a small detail that lifts the whole room, especially at night”. At Kelvedon, there is “an LED glow washing out from beneath the bath”.
Concealed strip in a floating vanity and a bath panel base
Two details from the same drawing convention. No dimensions, voltages or product depths are shown.
Floating vanity, underside strip
Bath panel base
Platforms and ledges give us another edge to work with. In Colchester, the bath sits “on a pebble-mosaic ledge with LED strip under the nosing”. Bradwell has “Mitred tile edges on the bath platform with LED light underneath”, while a Halstead family bathroom places the bath on “a curved oak ledge with recessed LED strip lighting underneath”. A lit step edge also makes the change in floor level clearer, which is useful in a room where the main lights may be off.
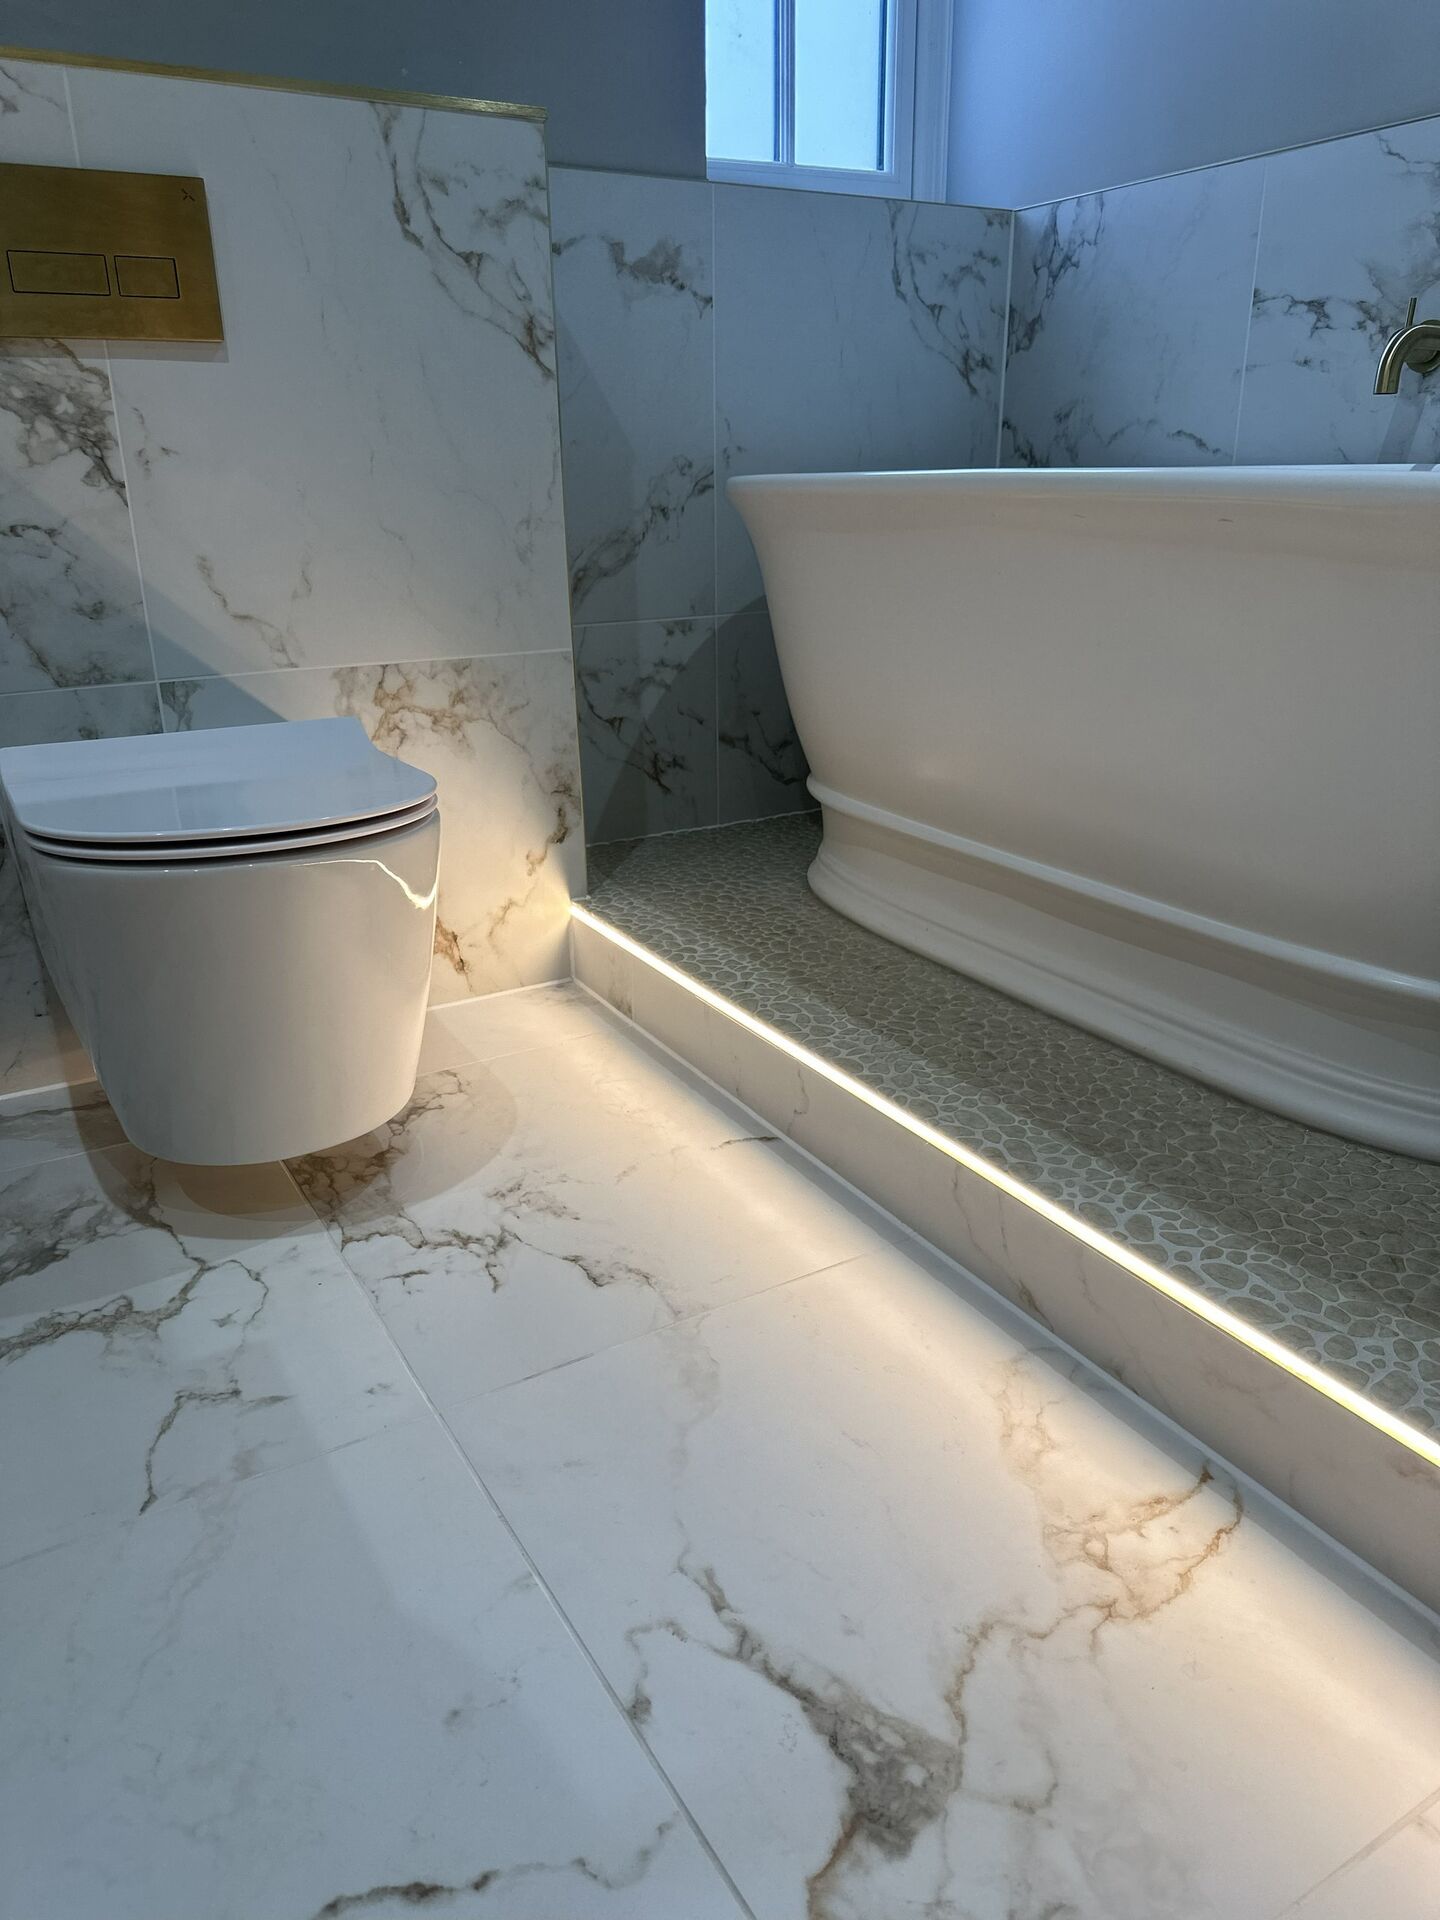
The catch is that floor-level lighting can sit in a different electrical zone from the furniture above it. SELECT’s summary of the wiring regulations says that the space beneath a bath or shower tray is zone 1 if it can be reached without a tool. If a tool is needed to reach it, that space is outside the zones.
In a shower without a tray, zone 0 is the space up to 0.10m above the floor, across the same area as zone 1. Anything installed there must be IPX7 and supplied by SELV no higher than 12V AC or 30V DC, with the safety source outside zones 0, 1 and 2. So a strip at floor level in a wet room is a different specification from one beneath a vanity across the room. Your electrician decides the zone.
The position should be drawn with the furniture or platform. As the Colchester project page puts it, “height, width, and lighting position all signed off”.
Coves, shadow gaps, feature walls and boxing
Coves, shadow gaps and illuminated boxing are built details rather than products, so they need to be drawn and formed before plastering or tiling begins.
For a ceiling cove or shadow gap, the strip sits behind a lip. You see light on the ceiling or wall, but the strip remains hidden when you look up from below. The plasterboard detail has to be formed at first fix, with the cable route and driver position allowed for at the same time.
Strip can also sit behind a panel or along the edge of boxing. Benfleet has “LED strip lighting behind the slat wall above” the WC and “LED strip lighting behind the 3D textured tile”. Bradwell’s bookmatched slabs have “LED strips lighting the edges”, while the brief for the Braintree CM7 wet room called for “LED lighting built into every surface”. Light coming across a textured surface from the side makes that texture much more apparent.
An aluminium profile helps to “dissipate heat from LED strips”, but the strip is still part of a system with a separate driver that may need replacing. If the lighting sits behind a fixed panel, there needs to be a way back to both parts, so agree with your fitter and electrician how the panel comes off, or where an access point goes, before it’s fixed.
Why some LED strip looks cheap: dots, colour and mismatched runs
Three things tend to give LED strip away. You can see the individual LEDs as dots, the white differs from the next run, or the light becomes dimmer towards one end. All three are decided when the strip, profile and driver are chosen.
Choose a strip that doesn't dot, or a profile that hides it
COB strip has a continuous coating over its LEDs. Häfele describes this as “Uniform light output: LED dots are not visible” and says it “Enables use of extremely shallow profiles”. That describes the product’s construction rather than making it a recommendation for every bathroom.
With a strip that has separate LEDs, an aluminium LED profile and opal diffuser do the hiding. Profile maker KLUS says avoiding the “unsightly ‘dotted’ effect” depends on choosing the profile’s “depth and width” and diffuser to suit the strip.
Keep the strip out of the line of sight
Even a good strip looks cheap when you can see it. In our view, the position often matters more than the product: at the head of the niche, beneath the vanity or behind a lip, as shown in the table above.
One colour of white, one product, every run
Colour temperature, measured in kelvin, describes the colour of the light. CRI describes how faithfully colours appear beneath it. It is based on the average of test colours R1 to R8, with 100 as the maximum. Lighting maker ERCO says CRI “should be at least 80 in indoor areas containing people”.
Colour consistency is the part people often miss. Makers grade it using SDCM, also known as MacAdam steps, with a smaller figure indicating closer consistency. ERCO notes that “On a white wall, even small colour location deviations between the luminaires can be noticed”.
We’d buy every run as the same product, ask for the CRI and SDCM figures and avoid using one supplier’s strip in the niche and a different product beneath the vanity.
In our view, warm white suits most bathroom schemes. Whichever white you choose, use it for every run.
Even brightness along the run
On a long run, a maker warns that “the LEDs furthest away from the driver will be unlit or dimmed”. Long strips may therefore be split onto separate drivers or fed from the centre. That’s an electrician’s detail, but it determines whether a wall-length niche looks evenly lit.
Why some LED strip shows dots
Three strip types viewed end-on, from the diffuser or lens side. No LEDs-per-metre or profile depth figures are shown.
Bare strip
Strip in a diffused profile
COB strip
Looks expensive
- Strip out of sight, light on a surface.
- A continuous line, using COB or a profile with an opal diffuser.
- Every run the same white.
- Dims smoothly on a matching driver and dimmer.
- Driver reachable.
Looks cheap
- Strip visible from the doorway.
- A row of bright dots.
- Warm under the vanity and cold in the niche.
- One end dimmer than the other.
- Driver behind finished tiles.
Dimming, controls and where the driver goes
Whether a strip can be dimmed depends on its driver. That decision needs to be made when the driver is chosen, not when the switch is being fitted.
One manufacturer sells a 24V driver marked “NON-DIMM” alongside a mains-dimmable version that “integrates with leading-edge and trailing-edge dimmers”. The electrician needs to match the strip, driver and dimmer together.
A low-level strip can be operated from a separate switch or a sensor. Wickham Bishops uses a sensor beneath the vanity for light at night; see our hotel-style bathroom guide for more on that use. Not every illuminated product can be dimmed, though. The technical sheet for the HiB Vanquish cabinet says its light isn’t dimmable, so check the document for each product rather than assuming.
A low-voltage strip must never be wired directly to the mains. It runs from a separate driver. Drivers include indoor IP20 products described as “suitable for indoor applications” and sealed IP66 versions, but the correct one depends on where it will sit and the system it supplies.
Crosswater lists its niche driver as a spare part, and one strip maker’s troubleshooting guidance says the driver “may need to be replaced”. Where an electrician relies on SELV to protect equipment in zones 0 or 1, SELECT’s summary of BS 7671 places the SELV safety source outside zones 0, 1 and 2. That specific requirement shouldn’t be turned into a claim that every driver in every bathroom must sit outside the zones.
In our view, every driver needs a dry, reachable home that’s agreed before first fix and marked on the plan. Depending on the room, that might be a cupboard, a vanity void or a ceiling access hatch, provided the electrician and maker agree that the position is suitable.
A driver behind tiles is a driver you’ll pay to reach. Strips and drivers are replaceable parts, so the drawing should show where each driver lives and how it’s reached.
IP ratings and bathroom lighting zones for LED strip
The bathroom lighting zones set the minimum protection required. The strip’s own rating has to meet that requirement, but IP65 isn’t the rule for every position in the room.
In an IP rating, the first digit describes protection against solid objects. The scale goes up to 6, meaning no ingress of dust. The second digit describes protection against water and goes up to 9. IPX4 means protection against splashing water from any direction, while IPX7 covers temporary immersion.
An IP65 LED strip is, in one maker’s words, “protected against water jets and dust. Not suitable for water immersion”. That can make it suitable for some bathroom positions, but the zone, installation and maker’s instructions still decide whether it is the right product.
Swipe across to compare all columns.
| Zone | Where | Minimum for strip there |
|---|---|---|
| Zone 0 | Inside the bath or tray; in a shower without a tray, the space up to 0.10m above the floor, over the same area as zone 1 | Fixed and permanently connected, IPX7, suitable for zone 0 according to the maker, and supplied by SELV no higher than 12V AC or 30V DC, with the safety source outside zones 0, 1 and 2 |
| Zone 1 | Above the bath or tray up to 2.25m, or the highest fixed shower head if higher; without a tray, 1.2m out from the fixed shower outlet | Fixed and permanently connected, IPX4, or IPX5 where water jets are present, and suitable for zone 1 according to the maker |
| Zone 2 | 0.6m beyond zone 1 around a bath or tray; there is no zone 2 for a shower without a tray | IPX4, or IPX5 where water jets are present |
| Outside the zones | The rest of the room | SELECT’s summary sets no zone minimum here; the maker’s instructions and your electrician decide; RCD protection still applies |
Bathroom electrical zones: bath or tray, and a trayless shower
Plan view (looking down). Figures are exactly as given in the zones table above. No wall or room dimensions are implied.
Bath or shower tray
Shower with no tray (trayless)
The table is based on SELECT’s pocket guide to Section 701 of BS 7671:2018+A2:2022 and the IET BS 7671 FAQs. The current edition is BS 7671:2018+A4:2026, whose Section 701 text we haven’t been able to read. Your electrician must confirm the zones on site.
Every circuit serving the bathroom needs 30mA RCD protection.
Cutting an IP-rated strip can change its protection. One maker says silicone “is required to maintain the IP65 rating” at cut ends and recommends allowing seven days for it to cure before the strip gets wet. So a strip cut on site remains IP65 only if it is resealed in the way its maker requires.
The Halstead and Braintree CM7 wet rooms use IP67 lighting in their niches. That records what was specified for those projects; it doesn’t create an IP67 requirement for every niche.
In England, installing a new circuit, or adding to or altering a circuit within the special location, is notifiable under Part P. For this purpose, the special location extends 0.6m horizontally from the edge of a bath or shower tray, and up to 2.25m high or to the shower head if it’s fixed higher. Where there is no tray, it extends 1.2m from the centre of the shower head where it’s fixed to the wall or ceiling.
Notifiable work can be certified through a registered competent person, a registered third-party certifier or building control. Work that isn’t notifiable still has to comply with the regulations. Wales, Scotland and Northern Ireland have their own requirements. See Approved Document P and our guide to UK bathroom regulations for the approval process.
As one maker’s guide puts it, “A qualified electrician should install this product”.
Mistakes that give the strip away
Strip you can see from the doorway
The strip was placed where it was easiest to fix rather than where it would be hidden. Check the sight lines on the drawing and try the proposed position before fixing it, as the maker suggests.
Dots on a gloss surface
A strip with separate LEDs in a shallow channel, or without a suitable diffuser, can show as a row of dots. In our view, polished tile can make the problem worse by reflecting those dots into the room.
Two whites in one room
The niche and vanity use different products or batches. Colour differences between light sources are particularly noticeable when both are washing light onto a plain wall.
A driver nobody can reach
The driver has been sealed behind tiles or a fixed panel. Drivers are replaceable parts, so access needs to be decided before the surface is finished.
Concealed LED in Bowmans projects
Swipe across to compare all columns.
| Project | Where the strip is | Link |
|---|---|---|
| Gosfield CO9 shower room | Head of three stacked niches, warm-white strip | View project |
| Chelmsford CM2 family bathroom | Under the walnut vanity and the niche shelving over the WC | View project |
| Braintree CM7 family bathroom | Where the bath panel meets the floor | View project |
| Colchester CO1 family bathroom | Under the nosing of the bath ledge | View project |
| Kelvedon CO5 family bathroom | Beneath the bath panel | View project |
| Halstead CO9 wet room | Long niche, warm IP67 recessed LEDs; floor strip by the oak shelving | View project |
| Bradwell CM77 family bathroom | Under the bath platform; three niches; edges of the bookmatched slabs | View project |
| Benfleet SS7 master ensuite | Behind the slatted wall above the WC | View project |
The projects use strip in different places, but the design problem is the same: hide the source and decide its position with the niche, furniture or tiled edge around it. For a long run, the strip also needs to read as one continuous, evenly lit line.
How we handle it: concealed strip is drawn with the tiles, niche and joinery, so its position and what you’ll see from the door are settled before first fix. Agree where each driver will live, and how it will be reached, with your electrician at the same stage. Design is included when you choose your products with us. Your electrician confirms the strip, drivers and controls for each position, installs them, certifies the work and notifies it where required.
If you’re buying for your own fitter, give them and the electrician the drawing and the makers’ documents for any illuminated niche or product you order.
Frequently Asked Questions
Sometimes, particularly beneath a floating vanity or behind a new panel, if a suitable cable route and driver position can be found without disturbing the tiling.
Adding it to an existing niche is much more awkward because making space for the strip and cable can mean cutting finished tiles and disturbing the waterproofing. We'd normally plan that work into the next refit.
Planning concealed lighting
Start by marking where you want the light to land, whether that’s the niche, floor, bath, step or ceiling. Then choose the strip, profile, driver and controls with your electrician before the niches, joinery and plasterboard details are built.
You can book a showroom visit at Braintree or Leigh-on-Sea and bring the room dimensions and photographs of the lighting details you like. Your own fitter and electrician are welcome, and design is included when you choose your products with us.