Bowmans · Inspiration · Design
Luxury bathroom lighting design: how to plan a four-layer scheme
Most bathrooms get a single ceiling light, three downlights chosen for being on offer at the wholesalers, and a mirror with a switch beside it. The result is the lighting equivalent of an office strip-light pretending to be a hotel — flat, cold, and unflattering at the one moment of the day people stand directly underneath it. A luxury bathroom needs four lighting layers, set on at least four separate circuits, on dimmers, and specified before the plasterer arrives. We're going to walk through how that scheme actually goes together.
01 · The framework
What is layered bathroom lighting?
Layered bathroom lighting means designing four separate lighting layers, each with its own purpose, each on its own switched circuit, all dimmable, all working together. The four layers are ambient (the general wash on the room), task (lighting at the vanity for shaving, makeup, and seeing your own face properly), accent (cove, niche and under-vanity strip that adds depth without spilling into the ambient layer), and decorative (the pendant, chandelier or sconces that exist for the look as much as the lumens). Get all four right and the room reads as designed; miss two and it reads as functional.
The reason cheap bathrooms feel cheap is almost never the tile or the brassware — it's that they have one layer of light, on one switch, at one brightness. A 5-watt-per-square-metre downlight grid blasted onto white tile will make any tap, any basin, any tub look like it belongs in a budget chain hotel. Layer that same room with a dimmable ambient grid at 30%, a backlit mirror set to 2700K, a cove uplight on the ceiling line and a single decorative pendant over the bath, and the materials read as luxury — even if the products themselves are mid-spec.
The honest reason most UK bathrooms get one or two layers instead of four is that the cabling has to be run before the plasterer arrives. Adding lighting layers later means surface trunking, which fails the brief before any of the fittings go in. This is one of the four trigger conditions where a designer earns their keep: lighting is invisible until it's there, and it cannot be retrofitted properly. We've covered the broader case for hiring a designer separately in our honest guide on whether a bathroom designer is worth it, and the wider sequence of pre-design decisions in our 14-step luxury bathroom planning checklist — lighting design is the canonical example of why the answer leans yes once you're past £15,000 of project spend.
The American Lighting Association has been pushing layered design as the residential standard for over a decade, and the UK trade press has caught up since around 2022 — but the showroom-floor reality lags the literature by years. Most UK luxury bathroom installs in 2026 still under-spec lighting, because the sanitaryware and brassware suck up the budget conversation and the lighting falls to "we'll figure that out with the electrician". By the time the electrician is on site, the cabling decisions have already been made by default, and the four-layer scheme is no longer possible. The way to fix this is to design lighting at the same time as the layout, on the same drawing, before any cable is pulled.
02 · The regulations
Bathroom lighting zones — BS 7671 Amendment 3:2024
UK bathroom electrical work is governed by BS 7671:2018 incorporating Amendment 3:2024, published 31 July 2024, which sits underneath Approved Document P (Electrical safety, dwellings, 2013 edition). Amendment 3 made one widely misunderstood change: Zone 3 has been removed. The bathroom now has three zones — Zone 0, Zone 1 and Zone 2 — and a great deal of older UK guidance still talks about Zone 3 like it exists. It does not. Anything you read referencing Zone 3 was written before 31 July 2024 and is out of date. (For the wider compliance picture, see our UK bathroom regulations 2026 guide — Approved Documents G/L/M/P/T plus BS 7671 in plain English.)
The zones are defined by proximity to water:
- Zone 0 — inside the bath or shower tray. Any fitting here must be IPX7 minimum (protected against immersion to 1 metre) and run on SELV (Separated Extra-Low Voltage) at 12 volts maximum. In practice, only the most specialist underwater LED would qualify, and almost nothing in a domestic luxury bathroom belongs here.
- Zone 1 — directly above the bath or shower tray, up to 2.25 metres above the finished floor level. This is where shower-head spotlights, bath pendants and any over-bath fitting live. IPX4 minimum (splash-proof from any direction) and 30mA RCD protection on the circuit.
- Zone 2 — extending 0.6 metres horizontally beyond Zone 1, and the corresponding region around basins. IPX4 minimum. Most vanity wall lights and mirror lights live here.
Outside Zone 2, standard fittings apply — but the entire bathroom circuit must still have 30mA RCD protection. This is non-negotiable. The Amendment 3:2024 update made RCD protection mandatory on all circuits serving a bathroom, including the lighting circuit, with no opt-out. Modern consumer units with RCBOs (one combined MCB-plus-RCD per circuit) meet this; older split-load consumer units may need rewiring to comply.
Two implications for the design of a luxury bathroom lighting scheme. First, every fitting on the drawing has to be specified with its IP rating against the zone it sits in — that beautiful unrated brass pendant from a heritage lighting catalogue cannot go over the bath, full stop. Second, the consumer-unit and RCD compatibility is a survey item, not an assumption — your electrician should check it on the first site visit, before any of the design choices get locked in.
"Cabling decisions get made by default the moment the plasterer arrives. Lighting design has to be on the drawing before then."
03 · Layer one
Layer one — ambient: getting the wash right
Ambient is the general wash on the room — the layer that lets you see where the floor is and where the door is. In most UK bathrooms it's a grid of recessed ceiling spots, and that's a perfectly good answer if the grid is set out correctly. The mistake almost everyone makes is positioning the spots in a regular grid centred on the room, which puts at least one downlight directly above the position where someone stands at the mirror.
A downlight directly above a person's head casts shadows downward across the eye sockets, the nose, and the chin. The result in the mirror is the racoon-eye effect that makes high-street bathrooms look terrible. The fix is to set the ambient grid out from the front of the vanity — the spot lights should sit forward of the person's standing position, throwing light onto the face from a slight downward-and-forward angle, not from straight above. As a rule of thumb, put the nearest downlight 600 to 800 millimetres in front of the vanity wall, not directly over the basin. The fitter will sometimes push back on this because it breaks the grid; the designer overrules.
Spot count and spacing depend on the ceiling height and the room area. For a 2.4 metre standard ceiling, six to eight downlights typically cover a 6 to 9 square metre bathroom. Above 2.7 metres or in a vaulted ceiling, the count goes up because the wash falls off with distance. We typically specify 5-watt to 7-watt LED downlights at 2700K to 3000K, IP65-rated regardless of zone (because they're going in a damp room), with a tight 36 to 60 degree beam angle so the light doesn't bounce wildly off white tile.
The ambient grid is the only layer where a single circuit on a single dimmer is acceptable. The other three layers each need their own switched live, but the ambient layer can be one zone — provided it's dimmable. Without the dimmer, the ambient layer becomes a binary on/off and you lose the entire point of the layered scheme. Every fitting on the ambient circuit must be a confirmed dimmable LED (not all are — check the spec sheet) and the dimmer itself must be a leading-edge or trailing-edge type matched to the LED driver. Mismatching a dimmer to an LED driver causes the flicker most homeowners blame on the bulbs.
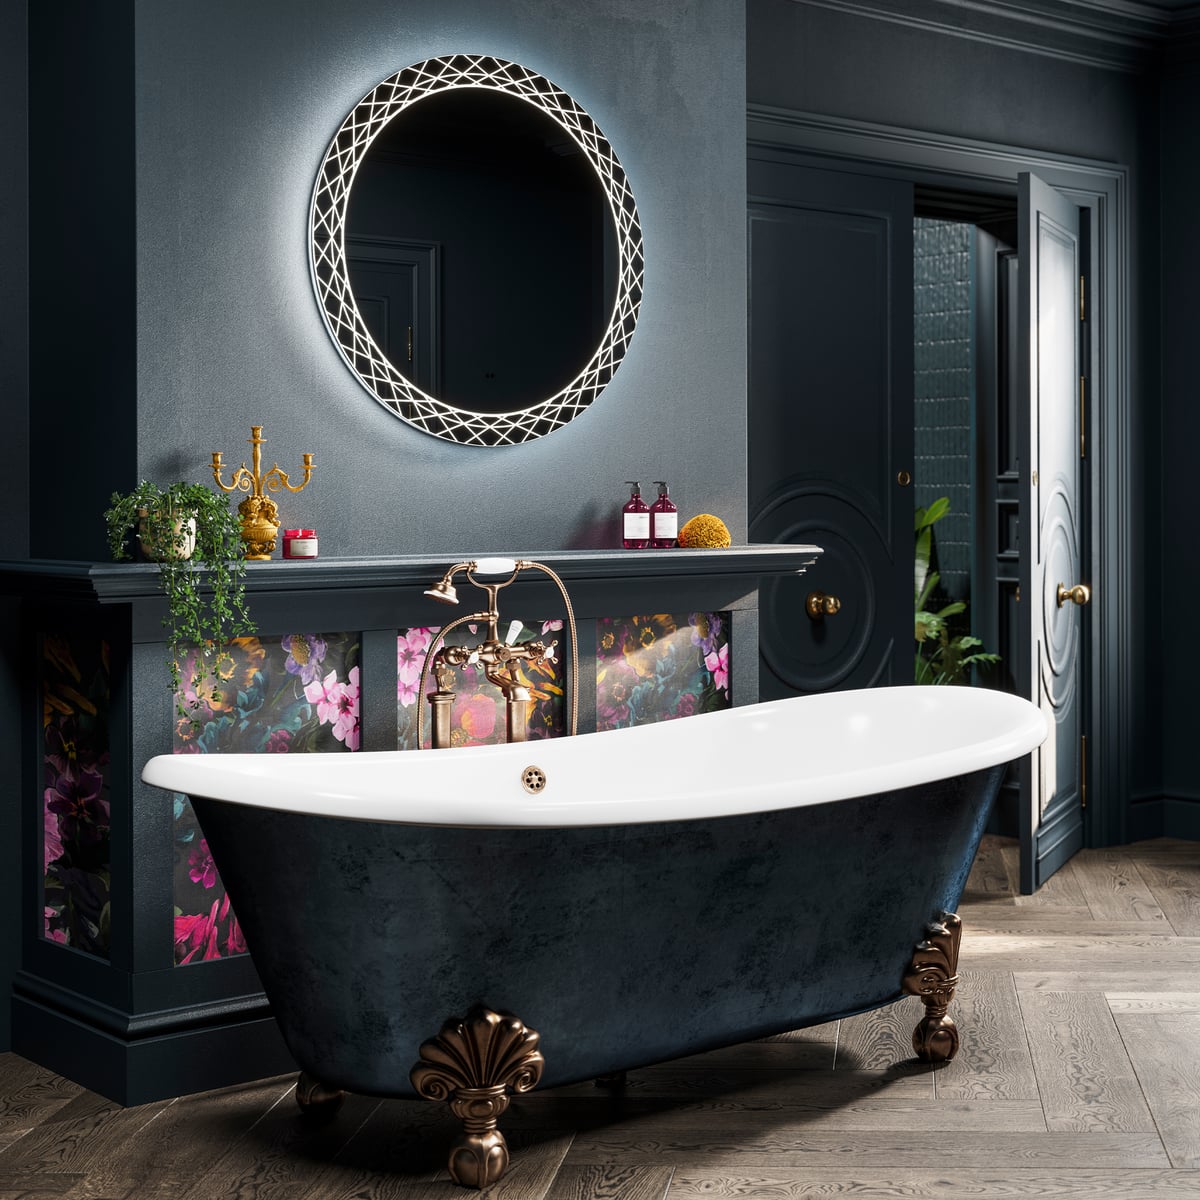
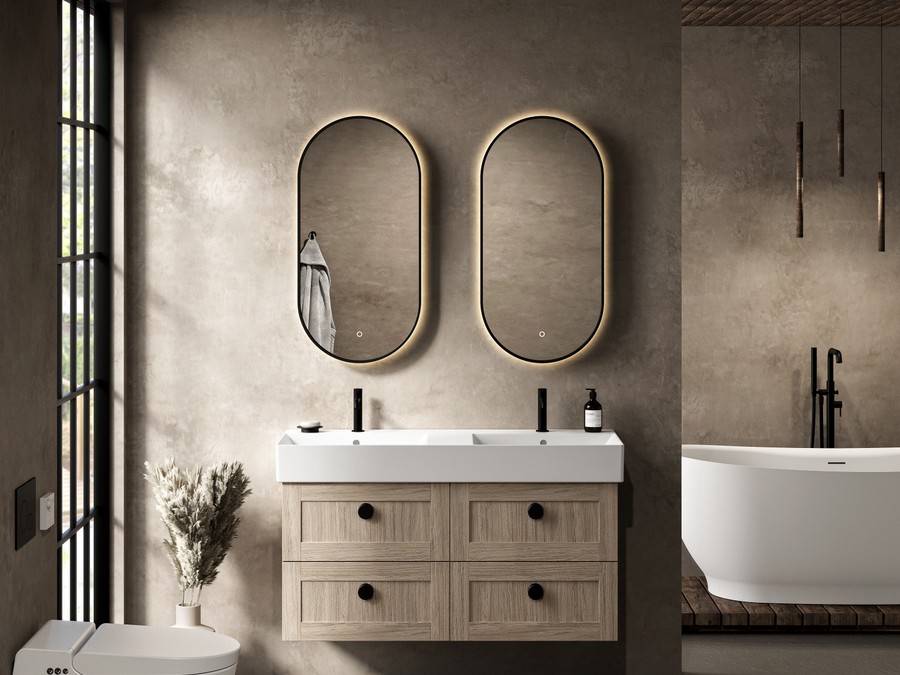
An alternative or addition to the downlight grid is a continuous cove — an LED strip recessed into a ceiling perimeter or shadow gap, washing the ceiling itself with light. The cove makes the ceiling read as floating, takes the harshness off any downlights below it, and is typically the single move that lifts a "good" bathroom into "high-end". It needs more design intent at the ceiling — the cove detail has to be planned at construction stage, not added afterwards — but on a luxury build it earns the effort.
04 · Layer two
Layer two — task: the vanity is the hero
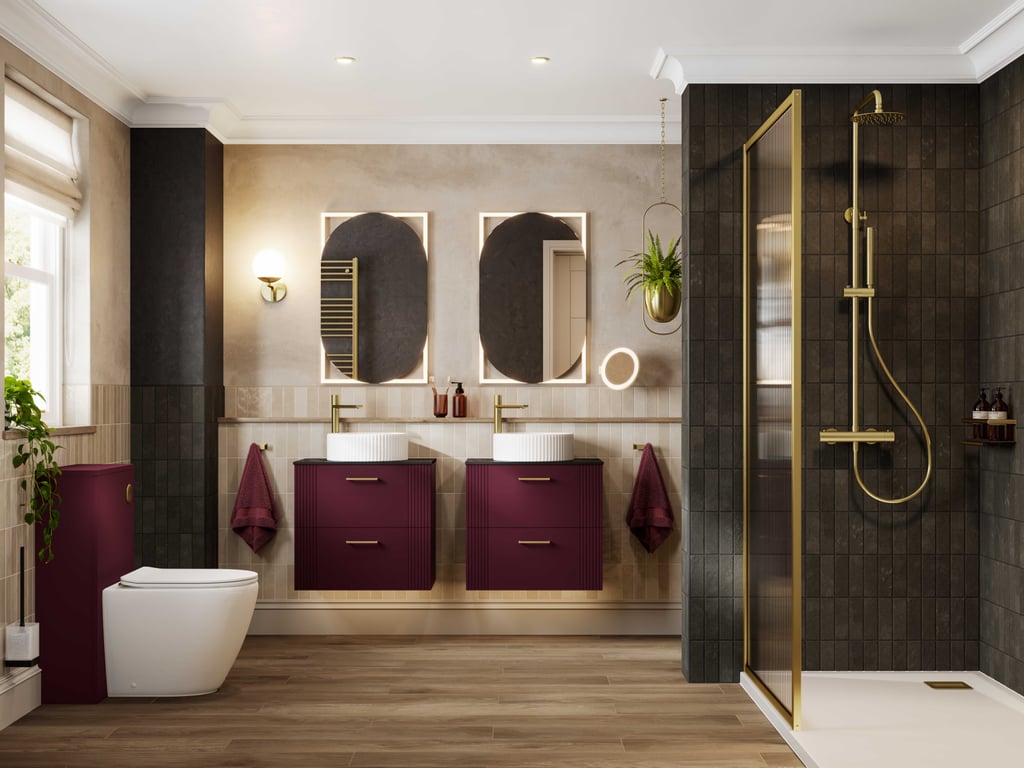
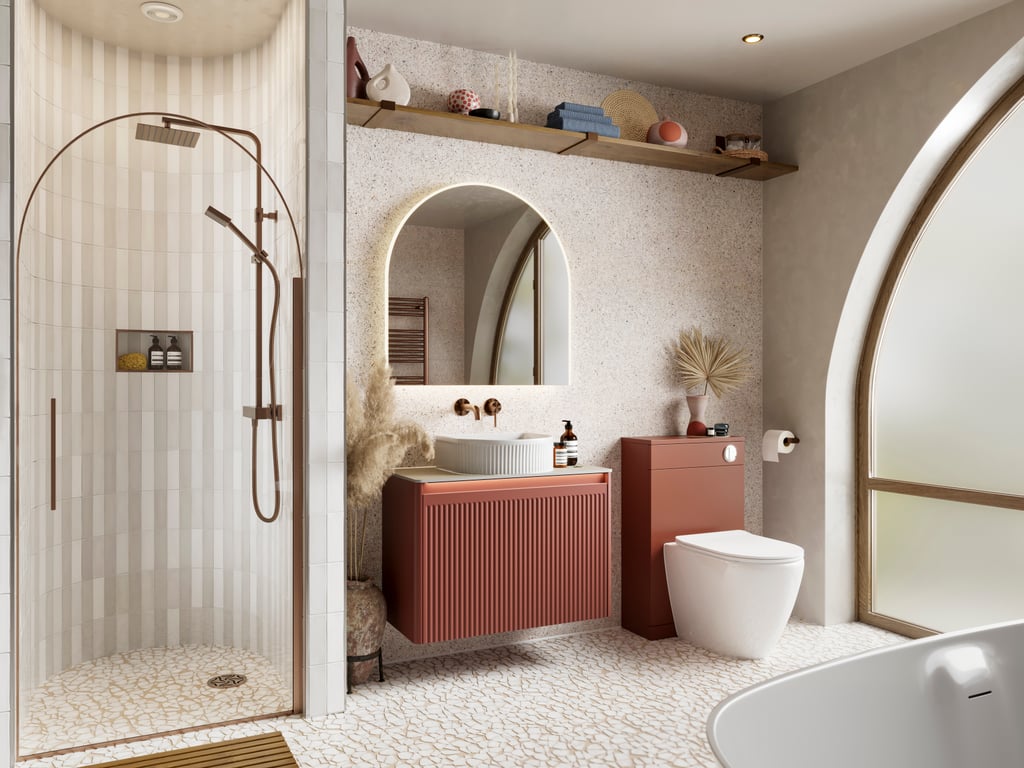
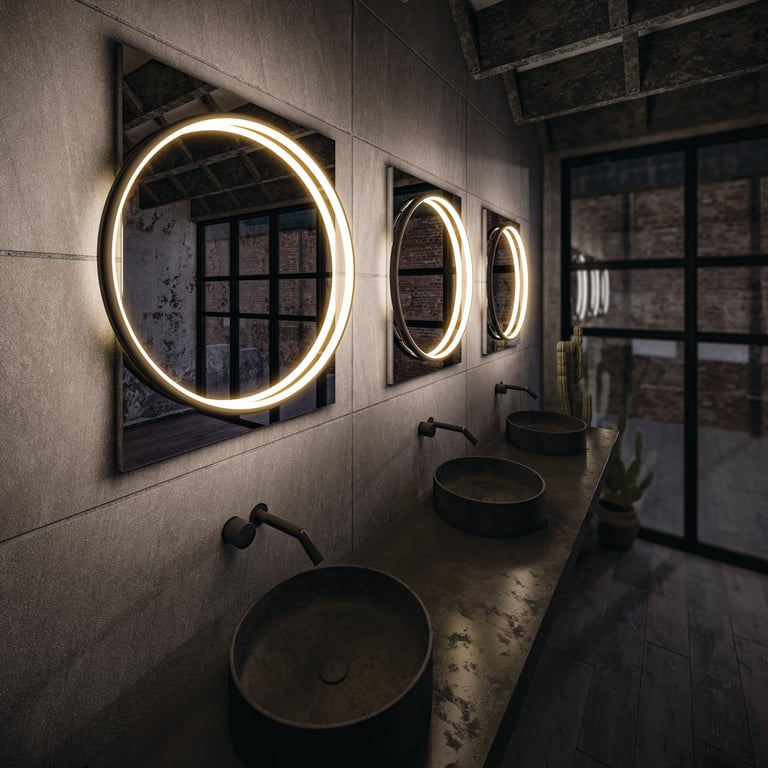
The vanity is the lighting hero of the bathroom because it's the one place where the lighting decision shows on a face. Every other layer is decoration; this one is functional. Get the vanity light wrong and the room is a clinic — get it right and the room is a luxury hotel. There are two viable approaches: a backlit (or LED-edge) mirror, or wall-mounted sconces flanking the mirror. Vanity-mounted strip lights or downlights placed above the mirror are the budget approach and produce the same downward shadow as the centred ambient grid; we don't recommend them on a luxury scheme.
The backlit mirror is the workhorse of modern luxury bathrooms. An LED edge-strip behind the mirror throws diffuse light forward through a frosted border, illuminating the face with no harsh shadow source and giving the mirror itself a slight floating quality where it meets the wall. Specification matters: target 2700K to 3000K colour temperature, CRI (Colour Rendering Index) of 90 or above (anything below 90 makes skin tones look greenish or pinkish), and a width that matches or exceeds the basin width below. Mirrors with adjustable colour temperature — typically 2700K, 4000K and 6500K presets — are useful for makeup application but should default to 2700K for the rest of the day; 4000K and 6500K make any room read as cold.
HIB is the most-specified backlit mirror brand in the UK luxury showroom market and the one we carry — the HIB range covers the Bellus, Alba, Cassini and Solas families with various sizes, IP44 ratings (suitable for Zone 2), built-in demister pads (which prevent the mirror fogging during showers), and sensor-controlled colour temperature on the higher-spec models. A good backlit mirror sits between £350 and £700 depending on size and feature level, and is typically the single most specified luxury upgrade in our showroom.
The sconces alternative — two wall lights flanking the mirror at eye height — is the more traditional approach and the one that produces the cleanest face-light if done right. Two key rules: the sconces sit at roughly 1.6 metres above finished floor (eye height for an average adult), and they must be IPX4 rated because they sit in Zone 2. The lamp inside must be 2700K to 3000K with CRI 90+. The most common mistake is specifying decorative sconces meant for a bedroom, which are not IP-rated and not legal in Zone 2 — your electrician will refuse to fit them, or should. The classic sconce setup feels period-appropriate in heritage schemes; the backlit mirror feels modern and integrated. Pick one; mixing both reads as overdone.
The task layer is on its own switched live — independent of the ambient grid and on its own dimmer. The reason: at 11pm getting a glass of water, you want the task light off and the ambient grid at 10%; in the morning shaving, you want task at 100% and ambient at 50%. One switch can't do both. A separate task circuit is non-negotiable on a luxury scheme.
05 · Layer three
Layer three — accent: cove, niche and under-vanity
Accent lighting is the layer that does the hotel-spa lift. It's almost never functionally necessary, but it's almost always the difference between a room that reads "well-fitted" and a room that reads "designed". The three places it matters most in a luxury bathroom: a continuous cove or shadow-gap detail at the ceiling perimeter, an LED strip set into a shower or bath niche, and a strip mounted under the vanity to wash the floor.
The cove is the most architectural of the three and the one that needs the earliest design decision, because the cove detail itself has to be planned at construction stage. A cove typically sits 100 to 150 millimetres deep, runs the full perimeter of the ceiling, and houses a continuous 24-volt LED strip behind a baffle that hides the strip from direct view. The strip washes upward onto the ceiling, which then bounces a soft general light back into the room. Critically, the cove takes the harshness off the downlight grid below it — without the cove, the downlights are individual point sources; with the cove, they sit inside a softer ambient field.
The niche LED — a strip set into the back of a shower niche or a bath surround niche — does double duty. It's accent lighting, and it's a tiny task light for whoever is using the niche. The trick is the strip must be IP65 (it's getting wet), and the driver must sit outside Zone 1 or Zone 2 in a ventilated location. Cheap LED strips in shower niches fail within two years from condensation ingress; specifying a proper IP-rated marine-grade strip with the driver mounted in a dry void elsewhere is the difference between a feature that lasts and a service call.
Under-vanity LED strip is the simplest of the three and the one most homeowners can specify themselves. A strip recessed into the underside of a wall-hung vanity, throwing light onto the floor, gives the vanity the floating quality every Pinterest board promises and acts as a night-light when someone gets up at 3am. Same IP rules apply (IP44 minimum because it's near the floor in a damp room), and the strip is typically on its own circuit so it can be left on overnight at very low brightness while the rest of the bathroom is off. We typically specify a warm-white 2700K strip at 60 LEDs per metre or denser — thinner strips show as pixelated dots through any diffuser.
06 · Layer four
Layer four — decorative: pendants and feature pieces
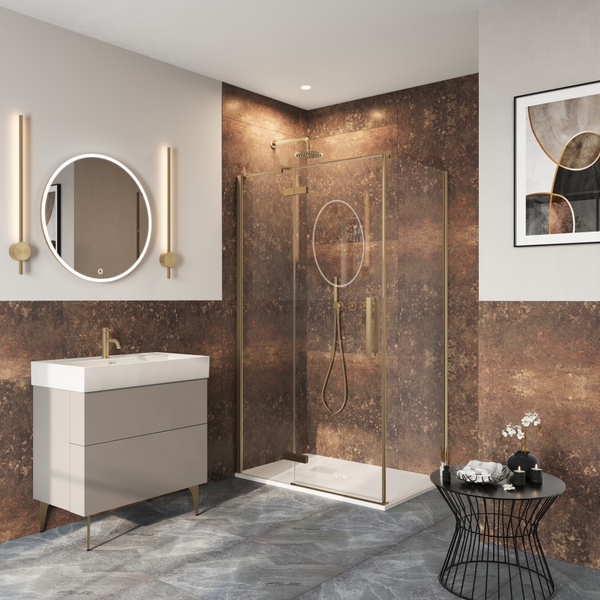
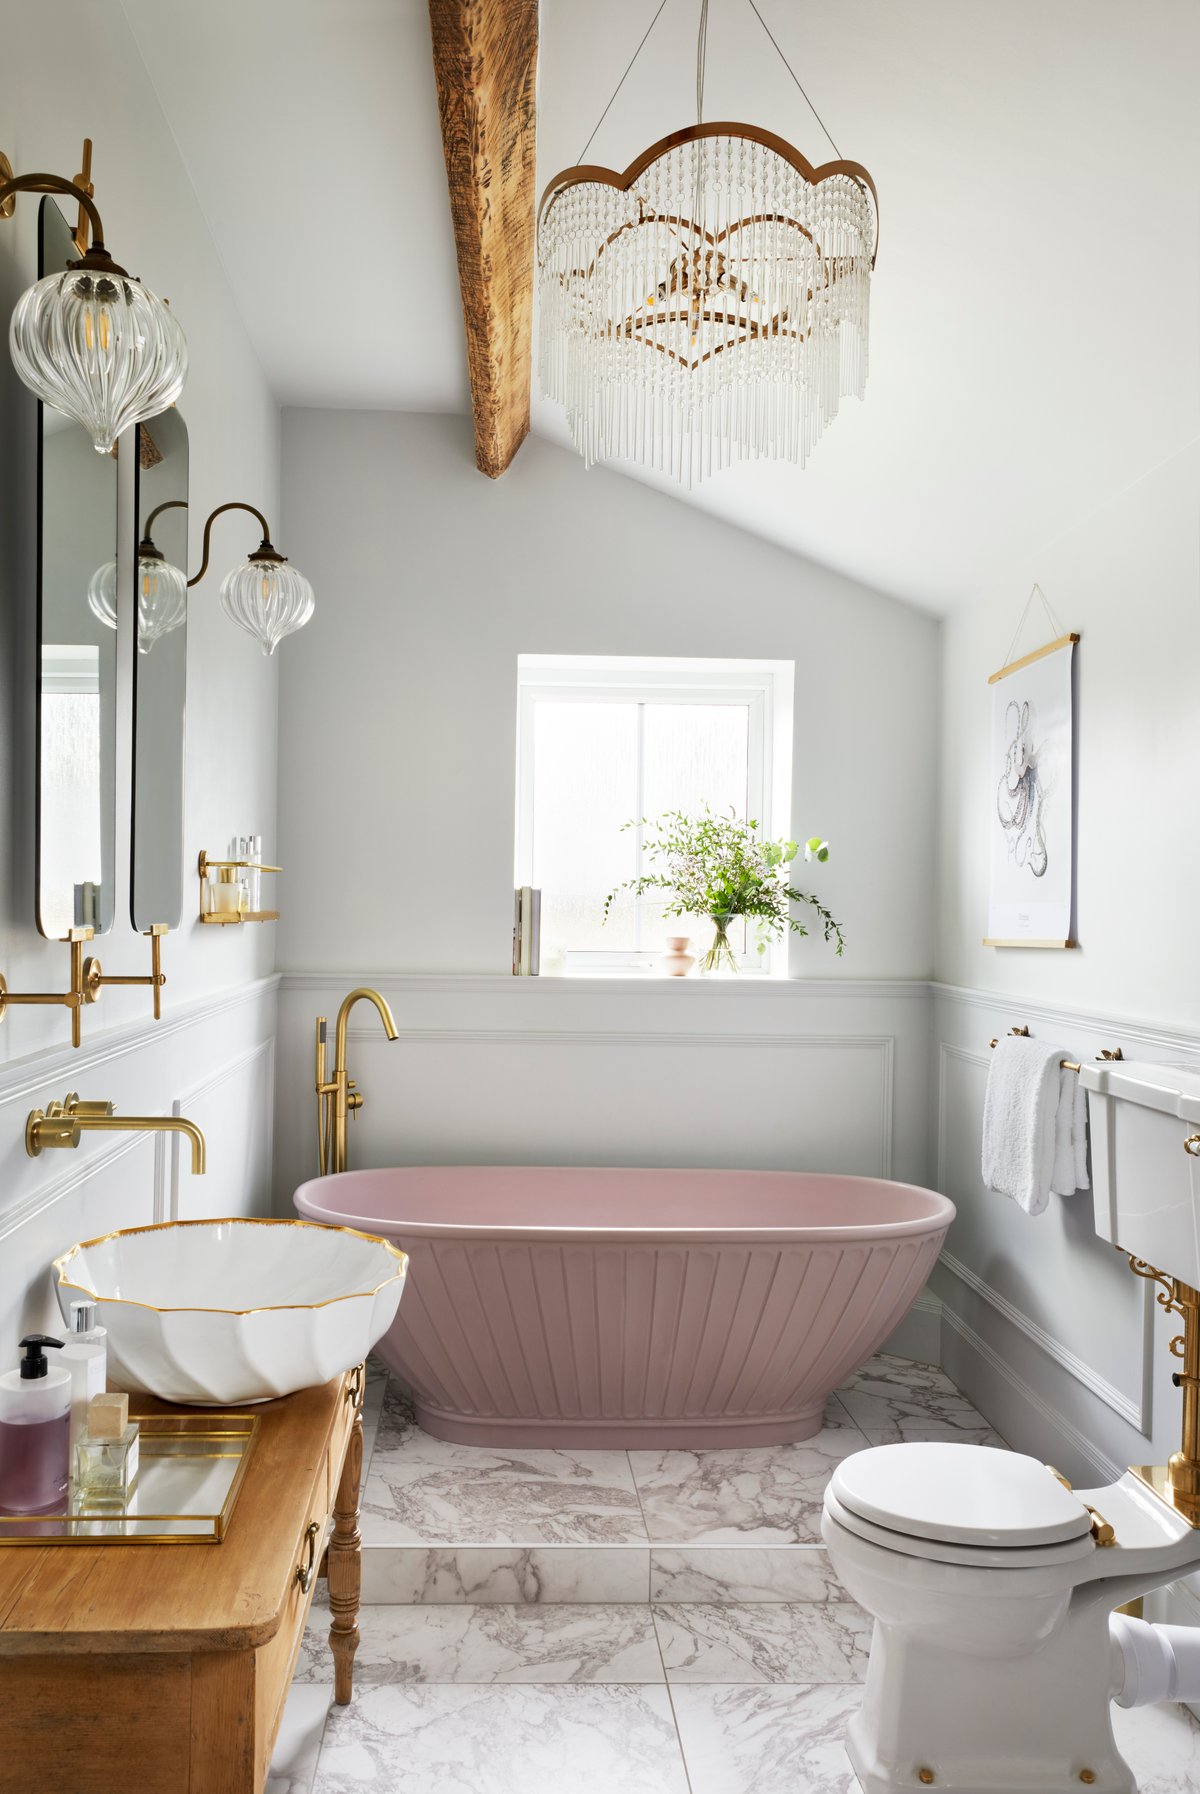
The decorative layer is the sculptural one — a feature pendant over a freestanding bath, a chandelier in a high-ceilinged ensuite, a single statement sconce on a return wall. It's the layer that earns the showroom photograph and the layer most likely to be wrong on the regulations. Three rules govern it: the IP rating must match the zone, the height must clear the head of someone using the bath, and the fitting must be on its own dimmable circuit so the decorative element doesn't have to be at full output to be on.
The classic move is a pendant or chandelier hung over a freestanding bath. The freestanding bath typically sits in the middle of the room or against a feature wall, and a pendant directly above it is a standard luxury detail. The regulatory reality: if the pendant sits above the bath at a height under 2.25 metres above the finished floor, it's in Zone 1 and must be IPX4 minimum. Most decorative pendants from heritage lighting catalogues are not IP-rated and cannot be used here. A small minority of premium pendant brands offer IP44 versions of their decorative ranges; if the brief includes a specific pendant, the IP rating must be confirmed on the spec sheet before it's signed off.
Pendant clearance over the bath rim matters as much as the IP rating. The lowest point of the pendant should sit at least 1.6 metres above the rim of the bath — this clears the standing height of someone climbing in or out of the tub without their head meeting the fitting. A 1.4-metre clearance looks dramatic in photography but produces a fitting people knock into during normal use. On a freestanding tub with a tall back like a slipper bath, add another 100 to 150 millimetres to that minimum. The lighting clearance should be on the layout drawing from the start, not added at electrical first-fix.
BC Designs is the most-specified UK freestanding bath brand we carry, and the one most often paired with a pendant detail in luxury schemes — the BC Designs range includes faceted, slipper, boat and double-ended forms, all of which suit the over-bath pendant treatment if the head height works out. The pendant choice is editorial; the regulatory and clearance work is engineering. Both have to be done.
The decorative layer can also include wall sconces away from the vanity (on a return wall by the bath, for example), a single drop pendant near the ceiling for sculptural effect, or a chandelier in a tall ensuite. Whatever it is, it sits on its own circuit on its own dimmer, runs at 2700K to 3000K like the rest of the scheme, and is sized for the room it's in. The most common error is over-scaling — putting a chandelier suited to a 4 metre ceiling into a 2.4 metre bathroom, which crowds the head height and flattens the sense of space. The fitting should fit the room.
One last note: natural light. If the bathroom has a large window, a roof light, or a sash window with shutters, the natural light dominates the ambient layer during the day and the artificial scheme runs as supplement. Plan the window treatment alongside the lighting — a heavy linen blind that comes down for privacy at the bath should be coordinated with the accent and decorative layers so the room reads as designed both with daylight at 10am and at 9pm with the curtains drawn. Browse the full range of bathroom layouts and styles we work with for examples of how natural light shapes the lighting plan in different room types.
07 · Control
Dimming and scene control
Four lighting layers on four circuits is the design; what makes them feel like a luxury scheme is the control. At minimum, every layer needs a dimmer. At the next step up, a scene controller lets the four layers switch together to a saved preset — "morning" might be ambient at 80% plus task at 100%; "evening bath" might be ambient at 15% plus accent at 60% plus decorative pendant at 100%; "night" might be under-vanity at 10% only, with everything else off.
For a dimmer-only scheme, the rule is one dimmer per circuit, matched to the LED driver on that circuit. Mismatched dimmers cause the flicker and buzz most homeowners blame on cheap bulbs — it's almost always the dimmer-and-driver mismatch instead. Your electrician should confirm the dimmer type (leading-edge, trailing-edge, or 0-10V) against each fitting's spec sheet before ordering. This is fiddly but unavoidable.
For scene control, two systems dominate the UK mid-luxury market: Lutron (specifically Lutron RA2 Select for residential) and Rako. Both let you save four to eight scene presets onto a wall keypad, both can integrate with smart-home systems if that matters to the brief, and both are available through bathroom-specialist electricians who already work with them. Lutron tends to come in slightly higher on cost and slightly higher on reliability and finish; Rako is a UK-based competitor with arguably better dealer support in our region. Either works on a luxury bathroom; we don't carry these systems ourselves but most luxury electricians in Essex specify one or the other as a matter of course. Budget £400 to £1,200 added to the lighting cost for a programmable scene controller, depending on circuit count.
The honest case for scene control: it earns its keep on a master ensuite where you and a partner use the room at different times of day with different needs, and on any bathroom where the layered scheme is genuinely four layers. On a smaller bathroom with a two-layer scheme, scene control is overkill and dimmers alone are fine.
08 · Investment
What it costs: bathroom lighting budget
A full luxury bathroom lighting scheme — fittings only, before electrician's labour — sits realistically between £800 and £2,500 depending on the layer count, the mirror spec, and whether a programmable scene controller is in the brief. That's a small fraction of a £25,000 to £40,000 luxury bathroom budget, and one of the highest-impact lines on the spec sheet. The breakdown roughly:
- Ambient downlights — six to eight IP65 LED downlights at £30 to £60 each, total £200 to £400.
- Task mirror — quality backlit or LED-edge mirror with adjustable colour temperature and demister, £350 to £700.
- Accent LED — under-vanity strip plus cove strip plus drivers and profiles, £100 to £250.
- Decorative pendant or sconces — depending on the piece, £100 to £400 for a single statement fitting, more for a bespoke chandelier.
- Dimmers and switches — quality dimmable switching across four circuits, £80 to £200.
- Scene controller (optional) — Lutron or Rako keypad and processor, £400 to £1,200 added.
On top of the fittings, electrician's labour for a full luxury bathroom rewire and lighting install runs £900 to £1,800 depending on complexity. That includes circuit pulls before plaster, fitting and commissioning, the BS 7671 compliance certificate and the Part P notification. Adding a scene controller adds £200 to £400 to the labour line for programming.
The honest framing on lighting cost: it's the line homeowners most often try to economise on, and it's the line that most often produces post-completion regret. £600 saved on switching the backlit mirror for a basic LED-edge unit shows on every face that uses the room for the next ten years. £200 saved by dropping the cove detail loses the single move that lifts the ceiling. The lighting budget is one of the few places where the marginal £500 produces a visible upgrade rather than a luxury for the same look — we cover the broader trade-offs of where to spend in our guide on what a luxury bathroom actually costs in the UK.
Bowman benchmarks product pricing on the lighting fittings we supply against the major UK online retailers, the same as we do on sanitaryware and brassware. The design service that designs the layered scheme onto the layout drawing is included — there is no separate fee for it, and there is no margin uplift on the lighting fittings to fund it. If you're working with us through a full bathroom design appointment, the lighting plan goes onto the same drawing as the layout, the spec sheet lists every fitting with its IP rating against its zone, and the electrician gets the package as a fitter-ready document.
Frequently asked questions
The questions UK homeowners ask before signing off a luxury bathroom lighting plan.
What's next
Want a layered lighting plan on your own bathroom?
Lighting is one of the few areas of a bathroom where designed-up-front and added-after produce visibly different rooms — and the cabling decisions get made by default if there isn't a drawing. If you're planning a luxury bathroom and want the lighting on the layout drawing from the start, the design appointment is where it goes on. Our product pricing on the fittings benchmarks against the major online retailers, so the design work — including the lighting plan — comes alongside the kit, not on top of it.
The first appointment runs at our Braintree showroom on the Springwood Industrial Estate, or our Leigh-on-Sea showroom. Bring measurements, photos, and any reference images for the look you want; we'll walk through how the four-layer scheme sits on your specific room and what an electrician will need on the documentation.