
Bathroom Tanking: What It Is, Where It Goes and What It Costs (UK)
Tanking is a waterproof layer that goes onto the substrate behind your tiles, before a single tile is fixed. Materials for one shower enclosure run roughly £100 to £350 including VAT. No Building Regulation in England requires it, so tanking is best practice rather than law.
Most people find out what tanking is after the ceiling below the bathroom stains. Tanking is the waterproof layer that sits behind your tiles, and it’s both completely hidden and cheap relative to everything else you’re buying for the room.
It’s also the one part of a bathroom you can’t go back and add later.
This guide covers what bathroom tanking is, where it goes, which system to use, what it costs, and what the UK rules really say.
Quick Navigation
What Is Bathroom Tanking?
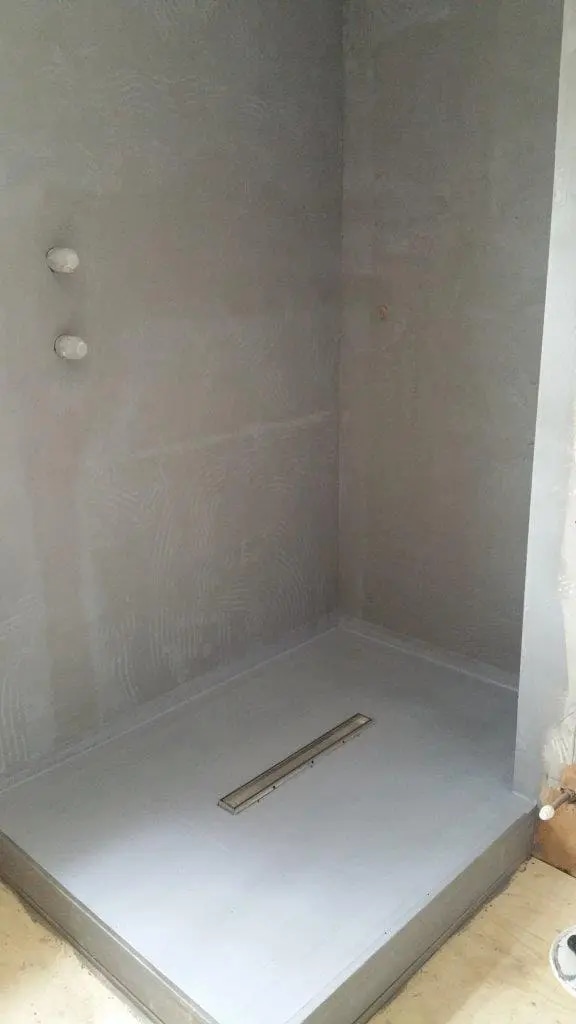
Bathroom tanking is a continuous waterproof layer applied to walls and floors before tiling, and the trade also calls it a tanking membrane or simply waterproofing. Once the tiles go on, you’ll never see it again. The most common areas for tanking include:
- Walk-in shower walls
- Wet-room floors
- Bath surrounds
- Floor-to-wall junctions between them
Tiles and grout slow water down, but they don’t stop it: grout is porous, silicone shrinks and splits with age, and buildings move just enough to open the grout lines up. Water that gets past the tile has to land somewhere. Tanking gives it a surface it can’t cross.
You don’t usually need it on a dry wall behind a WC, and where it goes matters far more than which brand you buy.
A System, Not a Product
The membrane is bonded rather than loose: it sticks to the substrate below and takes tile adhesive above. That bond is why tanking is a system, not a product, so the coating, the sealing tape, the corner pieces and the pipe collars all come from one range. Mixing ranges is how most systems fail.
Which Parts of a Bathroom Need Tanking?
Tank the wet zones rather than the whole room, and the table below is the working list.
| Zone | Risk | Tank it? | Guidance |
|---|---|---|---|
| Inside the shower enclosure | Direct, daily water | Yes | LABC Warranty asks for a water-resistant surface to at least 1800mm high |
| Wet-room floor | Standing and running water | Yes, always | NHBC requires a tanking system in all wet rooms |
| Around the bath | Splash and overspray | Yes, if tiled | Treat a tiled bath surround as a wet zone |
| Basin splashback | Light splash | Usually not | A tiled splashback on a sound wall is normally enough |
| WC and dry walls | Humidity only | No | Ventilation handles humidity, not tanking |
| Floor-to-wall junctions | The most common leak path | Yes | Seal with the system’s own tape or corner pieces |
| Pipe penetrations | Water tracks along the pipe | Yes | Use the manufacturer’s collar, not silicone |
How Far Past the Shower Should It Go?
There’s no single legal figure here, and the system manufacturer’s instruction always wins. Two published figures are still worth knowing.
LABC Warranty asks for waterproofing 150mm above the floor junction, plus a water-resistant surface to at least 1800mm high either side of the shower head and the gully or trap. CCL Wetrooms goes further again, asking that waterproofing covers the entire shower area and at least one metre beyond.
Compare that with the common trade habit of stopping 300mm past the enclosure, which is less conservative than either figure above. If a quote says 300mm, ask which manufacturer’s instruction it follows.
One exception is worth stating plainly. Do not tank under the tray unless the tray or former system specifically calls for it, and a full wet room changes the floor rules again.
How Is a Bathroom Tanked? The Three Systems
A bathroom is tanked in one of three ways: a liquid membrane, a sheet membrane, or a waterproof tanking board. All three do the same job, but they suit different substrates and different programmes.
Liquid Membranes
A liquid membrane is rolled or brushed on like thick paint, and it dries to a flexible, seamless film. BAL Waterproof 1C and Mapei Mapelastic AquaDefense are two common UK examples, and Mapei Mapegum WPS is another.
Coverage is the thing that matters, so don’t judge the film by eye. BAL Waterproof 1C needs 0.8mm dry on walls and 1.6mm on floors, while Mapegum WPS needs 0.5mm dry, roughly 1.2 kg per square metre over two coats. Work to the stated kilograms or litres per square metre.
Liquids suit walls, tray perimeters and awkward shapes, because they go around pipes and internal corners without any cutting.
Sheet Membranes
A sheet membrane is bonded to the substrate with adhesive or thin-set mortar, and there’s no film thickness to judge, because the sheet already is the right thickness.
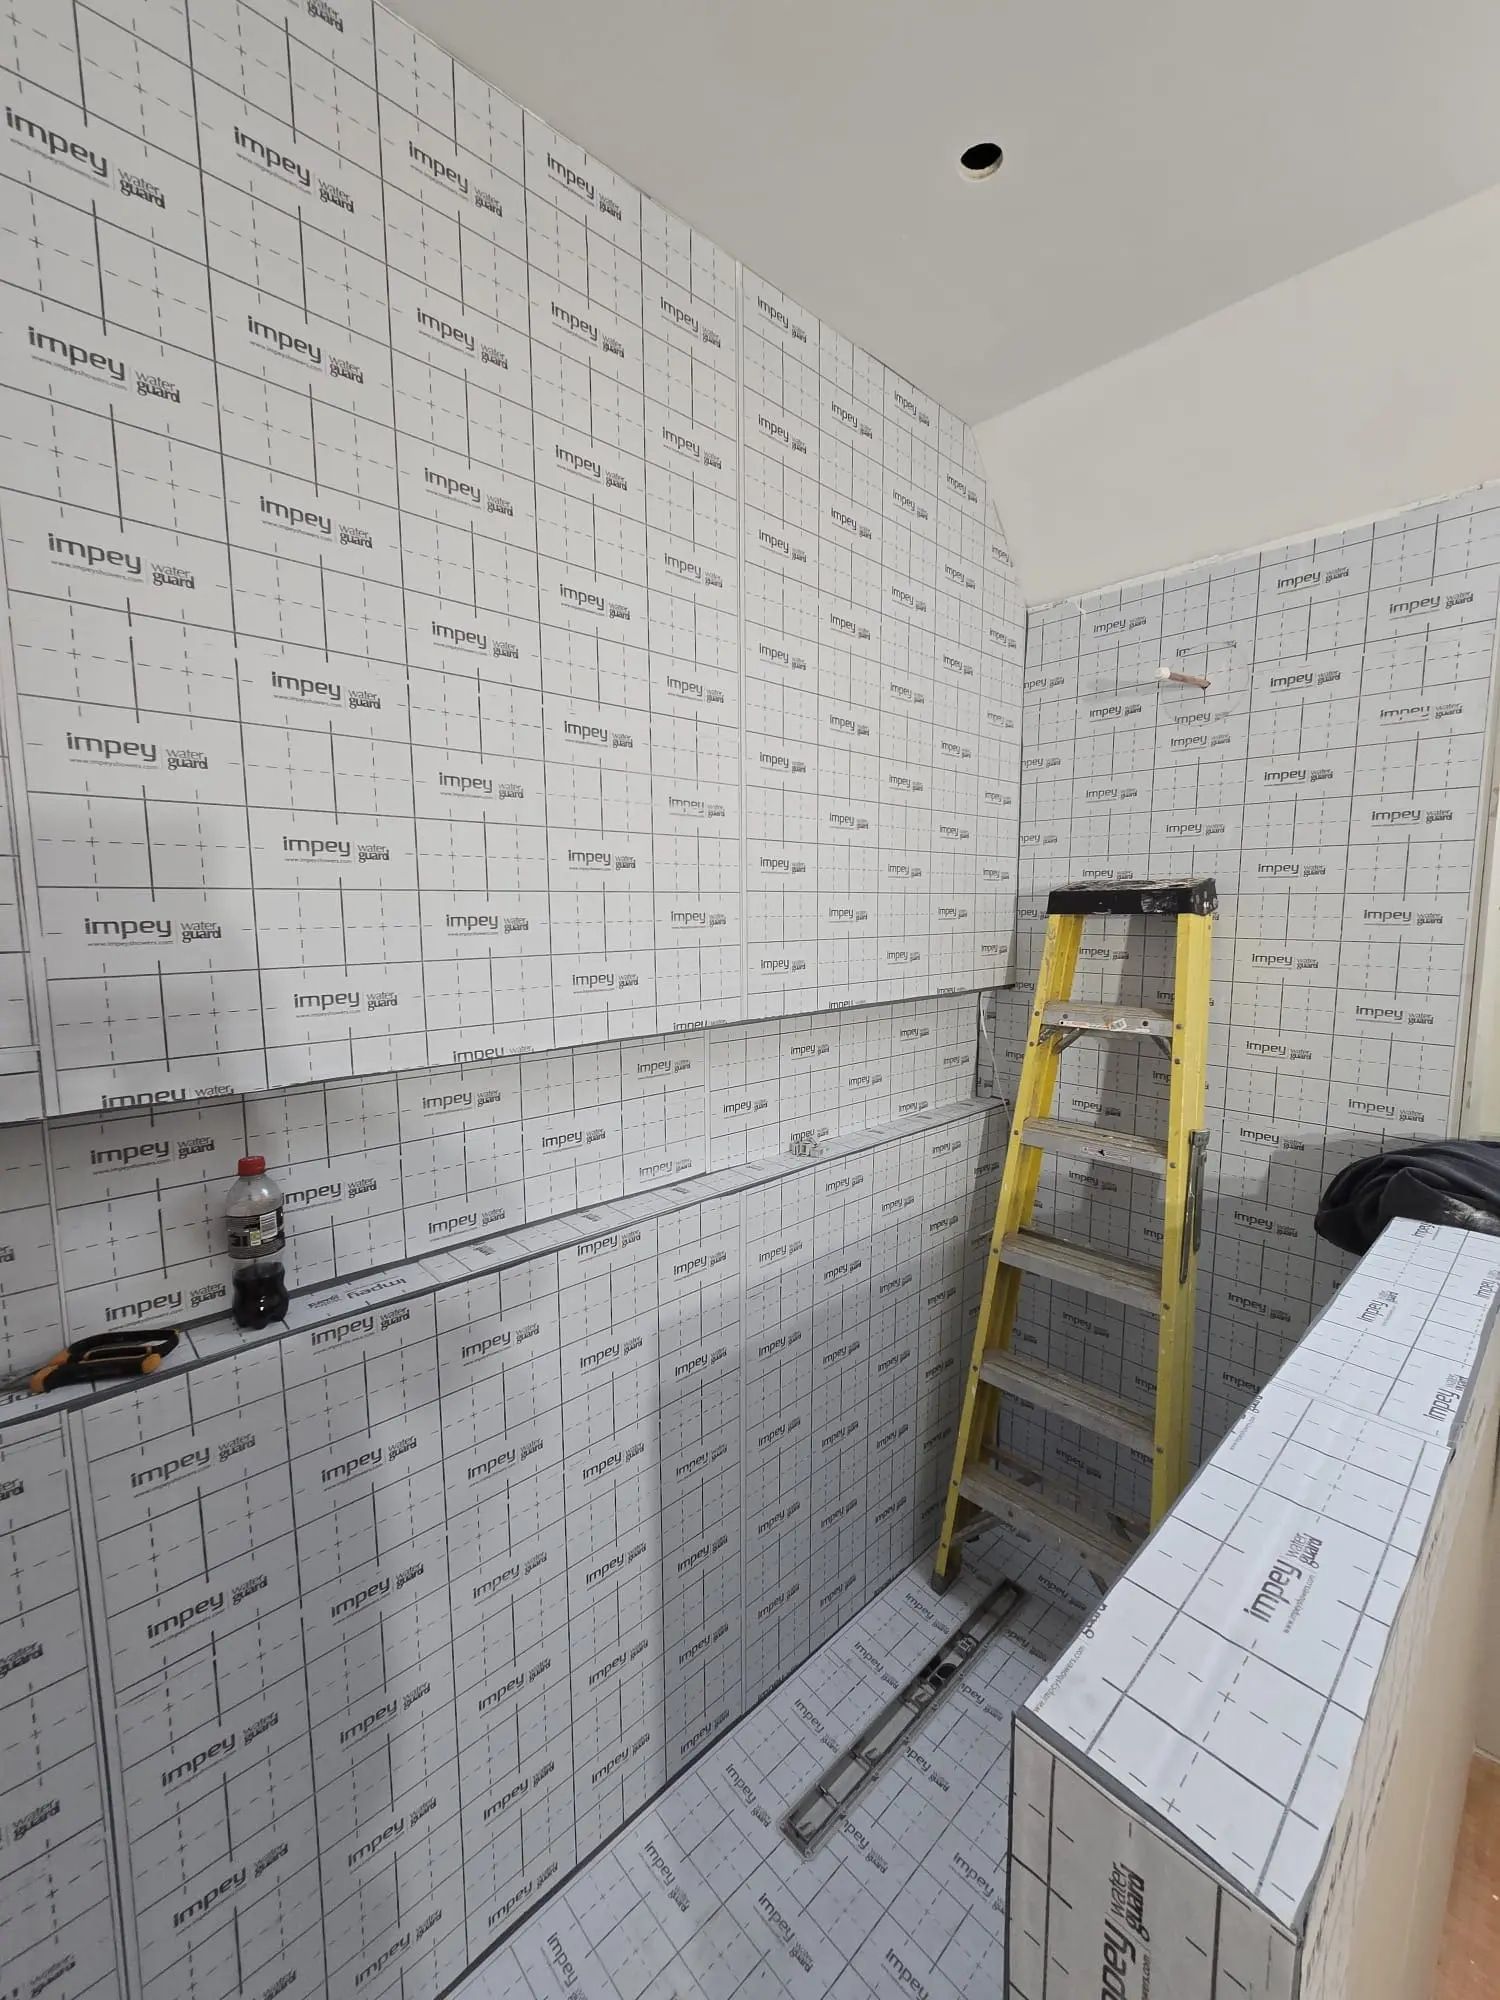
Schluter-KERDI is a bonded sheet 0.2mm thick, and Impey WaterGuard is a self-adhesive butyl sheet 1mm thick. Both come with matching tapes and pre-formed corner pieces.
Sheets suit floors, timber decks and wet rooms, and they suit a tight programme too, because neither one has a cure time to wait out.
Tanking Boards
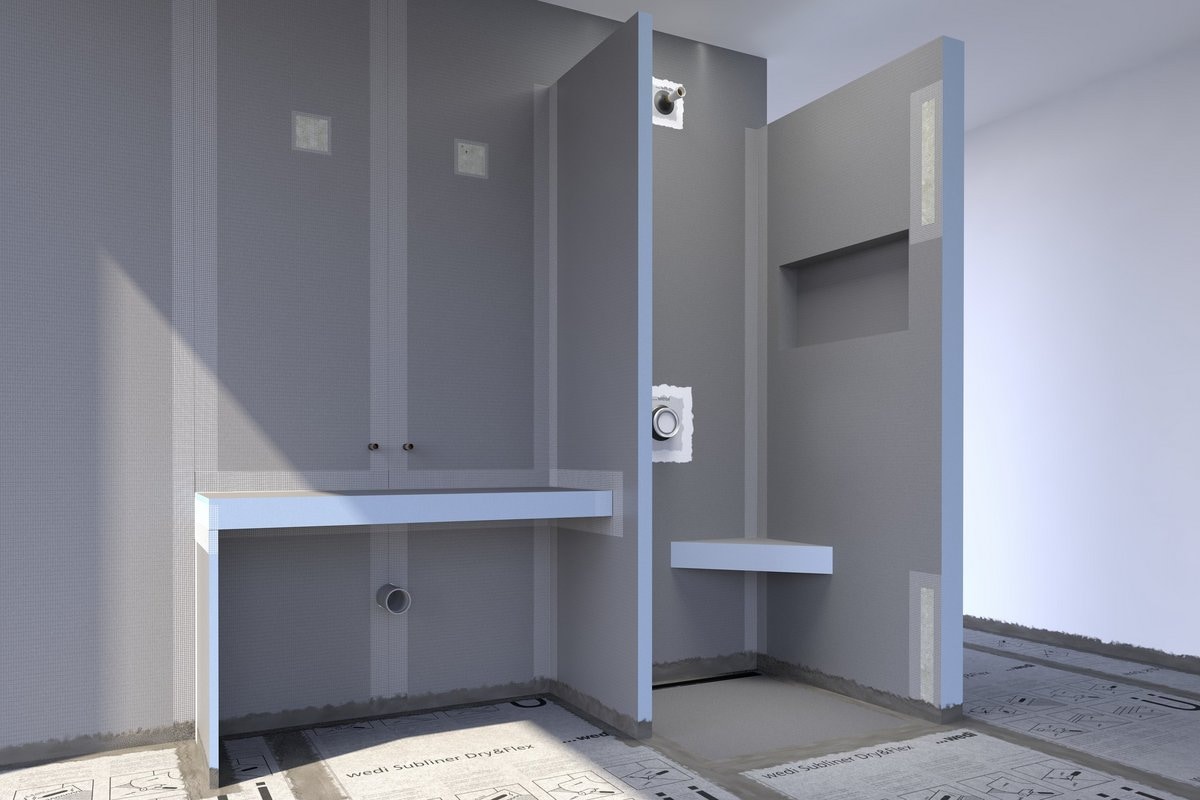
A tanking board replaces the substrate and the membrane in one step. wedi building board is the best known, and its blue XPS core is waterproof in itself, so no separate liquid or sheet goes over the board face.
What still has to be sealed is everything the board face doesn’t cover. Butt joints take wedi 610 sealant reinforced with wedi self-adhesive tape, and internal and external corners get the same treatment, as does every fixing, every screw penetration and the whole perimeter.
A board system fails at its joints, never through its face. Boards cost more per square metre, but they hand you a flat, stable, waterproof wall in a single pass.
Liquid, Sheet or Board: Which Should You Use?
Match the system to the substrate and the programme rather than to the price.
Choose a liquid
For a standard shower enclosure over sound plasterboard or a backer board. Liquids are the cheapest option and cover complex shapes with no cutting at all, though the trade-off is drying time plus the risk of applying too thin.
Choose a sheet
For a timber floor, a wet room, or a floor with underfloor heating. Sheets bring a known thickness and known performance, and most let you tile straight away.
Choose a board
Where you’re building the wall anyway. A new stud wall, a boxed-in duct or a shower bench are all better in board, because you get substrate and waterproofing in one.
Most good fitters mix them: a board or sheet low down, a liquid on the upper walls, all from one manufacturer’s range. Keep the tapes, collars and corners from that same range, because that’s what protects the guarantee.
Do You Need to Tank Behind Shower Panels?
No. A quality panel system is the waterproof layer itself, so there’s nothing to tank behind it.
The risk moves rather than disappears. With tiles the weak point is the membrane, and with panels it’s every joint and every cut edge.
Fibo panels fit directly onto sound, straight plasterboard or existing tiles, and Fibo states that the waterproofing depends on sealing all joints, all cut edges, and the areas around baths or trays. It specifies a hybrid polymer sealant and says plainly that you should not use silicone. A base profile is mandatory in wet areas.
You may also have seen Bushboard Nuance and Multipanel in the market. Nuance voids its guarantee if the wrong adhesive is used, and that pattern holds right across the category.
One correction is worth making, because it’s repeated everywhere. Not all panels use tongue-and-groove joints; that’s a Fibo feature rather than a universal one, so read the installation guide for the brand you’re buying.
With panels, the sealant schedule is the waterproofing.
Can You Tank Plasterboard (and Should You)?
On walls, yes, as long as you use moisture-resistant plasterboard and a system that lists it, because standard plasterboard is not acceptable in a shower.
This question gets three contradictory answers online, so here’s the precise position. BS 5385-1:2018 does not ban plasterboard in wet areas; what the 2018 revision did remove was plywood and wood-based boards as acceptable for direct tiling. That’s a real change and worth knowing.
Manufacturers are clear too. BAL lists internal plasterboard as a suitable substrate for Waterproof 1C with no primer needed, and LABC Warranty accepts moisture-resistant plasterboard on wet-room walls, along with a third-party approved cement backer board.
Floors are different. LABC states that a timber floor deck is not suitable for a wet-room floor, so it needs a water-stable, third-party approved component instead.
That leaves three positions. Moisture-resistant plasterboard, tanked with a system that lists it, is acceptable on shower walls, and standard plasterboard is not. A foam or cement backer board is still the better wall where depth allows.
The reason is structural rather than chemical. A backer board is dimensionally stable and carries more tile weight, and if you nick the membrane during tiling, a board wall forgives you where plasterboard doesn’t.
What About Tanking Over Existing Tiles?
Existing tiles are a valid substrate, which surprises people. BAL Waterproof 1C lists ceramic tiles, quarry tiles, terrazzo and natural stone among its substrates, usable without priming, and Mapei Mapelastic AquaDefense may be applied over existing ceramic, terrazzo and stone. Unglazed ceramic must be abraded first and cement terrazzo mechanically profiled, then both are skim-coated with an appropriate Mapei modified mortar.
The condition is the same either way: the tiles must be sound, well bonded and flat. Hollow or drummy tiles come off first.
How to Tank a Bathroom, Step by Step
Tanking happens after the substrate is fixed and before any tile goes on. That order never changes, and anyone offering to tank after tiling is describing a different job.
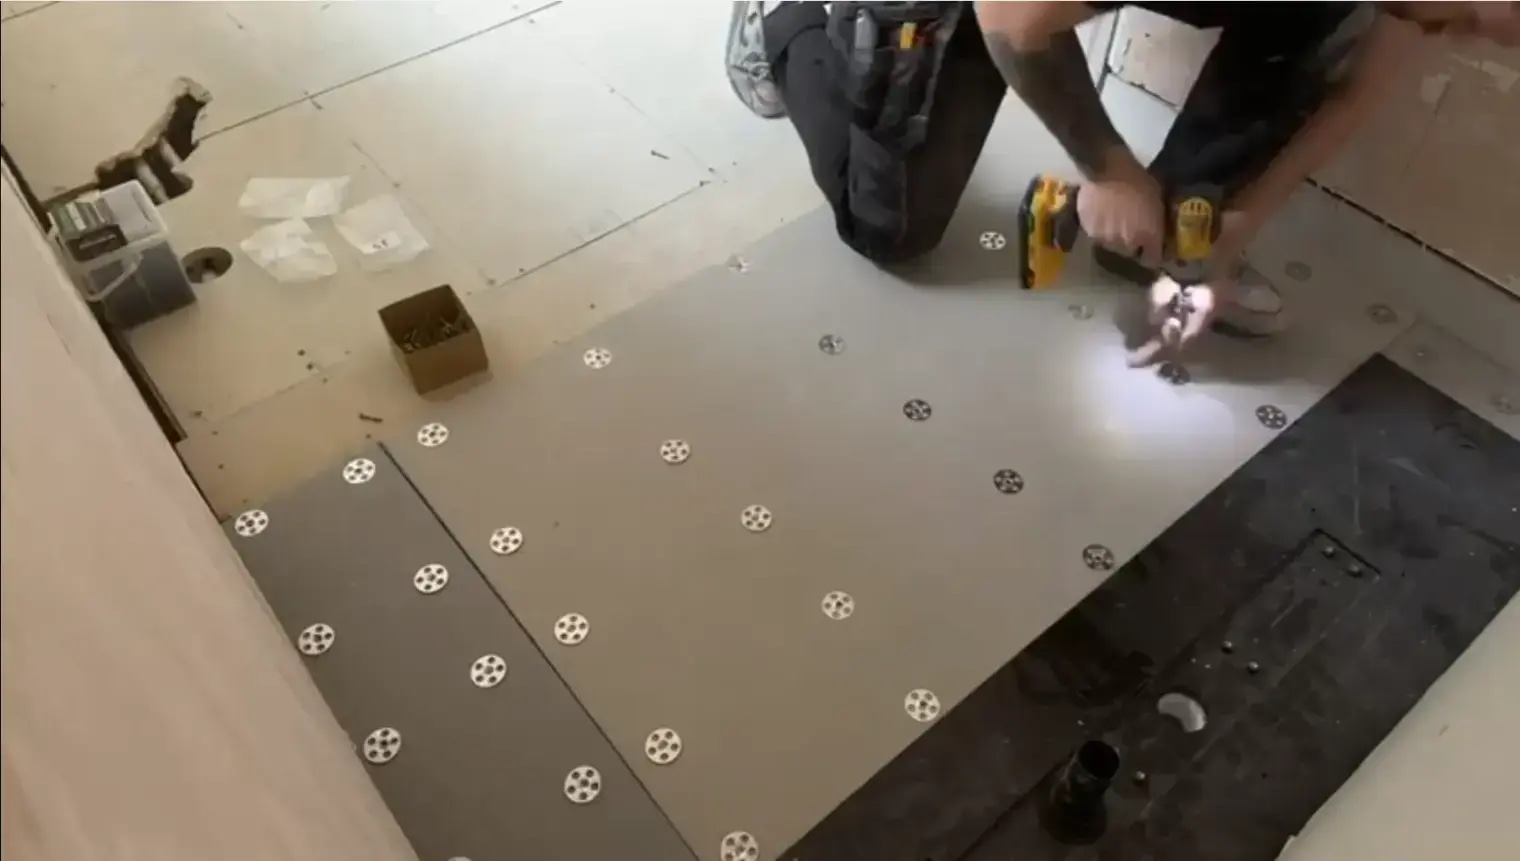
Prepare the Substrate
- • Fix the boards, then check they’re flat, sound and firm
- • Clean off dust, oil, flaking paint and loose material
- • Confirm the board you have is one the membrane really does list
Prime, If the Product Asks For It
- • Some liquids need a primer and some don’t
- • BAL Waterproof 1C needs no primer on plasterboard or existing tiles
- • Read the datasheet rather than assuming
Seal the Corners, Junctions and Pipes First
- • Bed the system’s sealing tape into wet membrane at every internal corner
- • Use pre-formed corner pieces at three-way junctions
- • Fit the manufacturer’s collar at each pipe penetration
- • Do all of this before the main coat rather than after it
Dress the Membrane Onto the Tray Upstand
- • The wall membrane runs down onto the tray upstand
- • Bridge that junction with the manufacturer’s own sealing band
- • Schluter requires all wall-to-tray connections to be waterproofed with KERDI-BAND, deliberately about half the thickness of KERDI to limit build-up under the tile
- • Impey WaterGuard kits ship with jointing tape and pre-formed corner pieces for the same detail
A bead of silicone in the corner is a finish rather than a waterproof detail.
Apply the Membrane Across the Full Area
- • Liquids: work to the stated coverage in kg or litres per square metre
- • BAL Waterproof 1C is one coat on walls, two coats on floors
- • Sheets: bond into fresh adhesive and lap every seam per the instructions
Wait for the Stated Time, Then Tile
- • Times run from none at all to 24 hours (see the table below)
- • Tile with a flexible adhesive suited to a tanked surface
- • Keep trowel corners and tile edges off the membrane
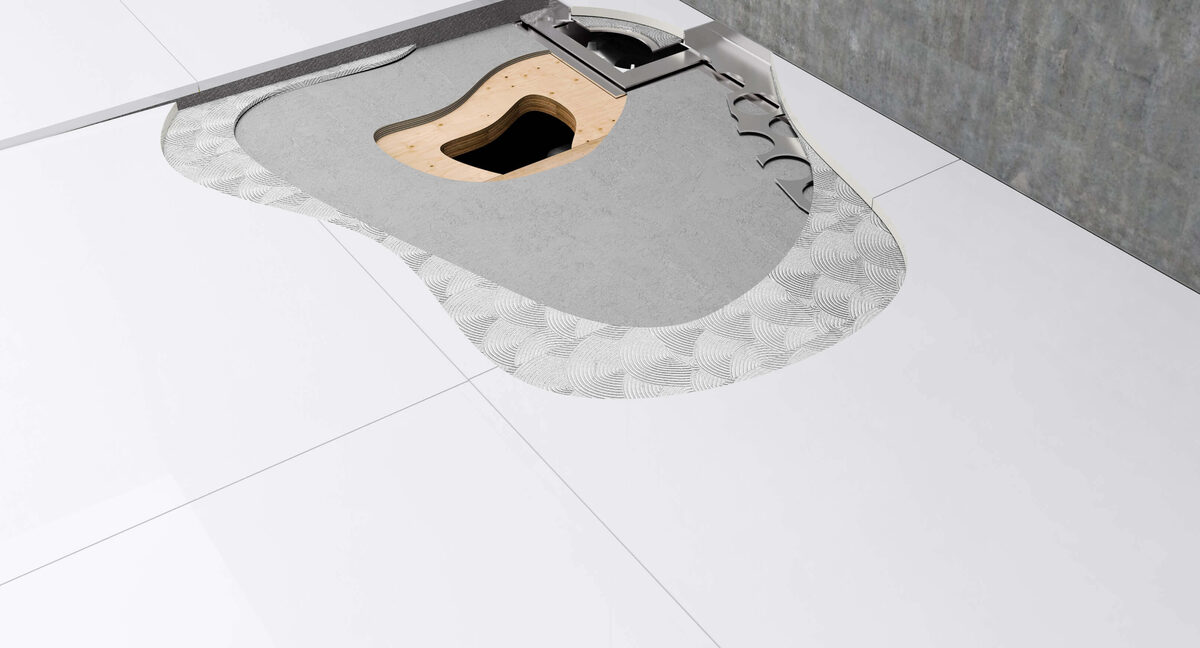
A wet-room floor adds two moves. The floor membrane laps and bonds into the wall membrane, and the drain body is bedded and sealed with the collar that comes with it.
How Long Does Tanking Take, and How Long to Dry?
A single shower enclosure is usually tanked in a few hours. Drying time is what sets the programme, and it varies enormously, so the old blanket answer of 12 to 24 hours is wrong for most modern systems.
| System | Type | Time Before Tiling |
|---|---|---|
| Schluter-KERDI | Bonded sheet, 0.2mm | None — tile once the bonding mortar has set |
| Impey WaterGuard | Self-adhesive butyl sheet, 1mm | None — tile immediately |
| BAL Waterproof 1C | Liquid | 2 hours at 20C. One coat walls, two coats floors |
| Mapei Mapelastic AquaDefense | Liquid | 1 hour after the first coat. Tile 4 hours after the second, at +23C |
| Mapei Mapegum WPS | Liquid | 12 to 24 hours. Dries in 5h at +23C, or 12h at +5C, for a 2mm layer |
Between coats, most liquids want somewhere between one and four hours, and the datasheet is the only figure that counts.
Cold rooms roughly double liquid drying times. A December bathroom with the heating off won’t behave like the datasheet, so get background warmth into the room before the membrane goes on, and leave it on.
Shower Enclosure vs Full Wet Room: What Changes
The waterproofing specification changes more than most people expect.
With a shower enclosure, you tank the enclosure walls and the tray upstand. The tray contains the water, so no floor membrane is needed, because none of it ever reaches the floor build-up.
With a wet room, the floor is the drainage surface, which means a continuous floor membrane lapped and bonded to the wall membrane, covering the whole floor where practical. The falls have to be formed, and the drain body is sealed into the membrane with its own collar.
LABC Warranty asks for a fall between 1:80 and 1:100 to the drainage point, though your former or gully manufacturer’s own figure overrides that. Pre-formed substrates such as On The Level build the fall in for you.
Two further constraints apply. LABC rules out a timber floor deck for a wet-room floor and wants a water-stable, third-party approved component in its place, and NHBC requires a tanking system in all wet rooms, with no flow-rate exemption.
For the full comparison of cost, install time and suitability, read wet room vs walk-in shower.
What Happens If a Bathroom Is Not Tanked?
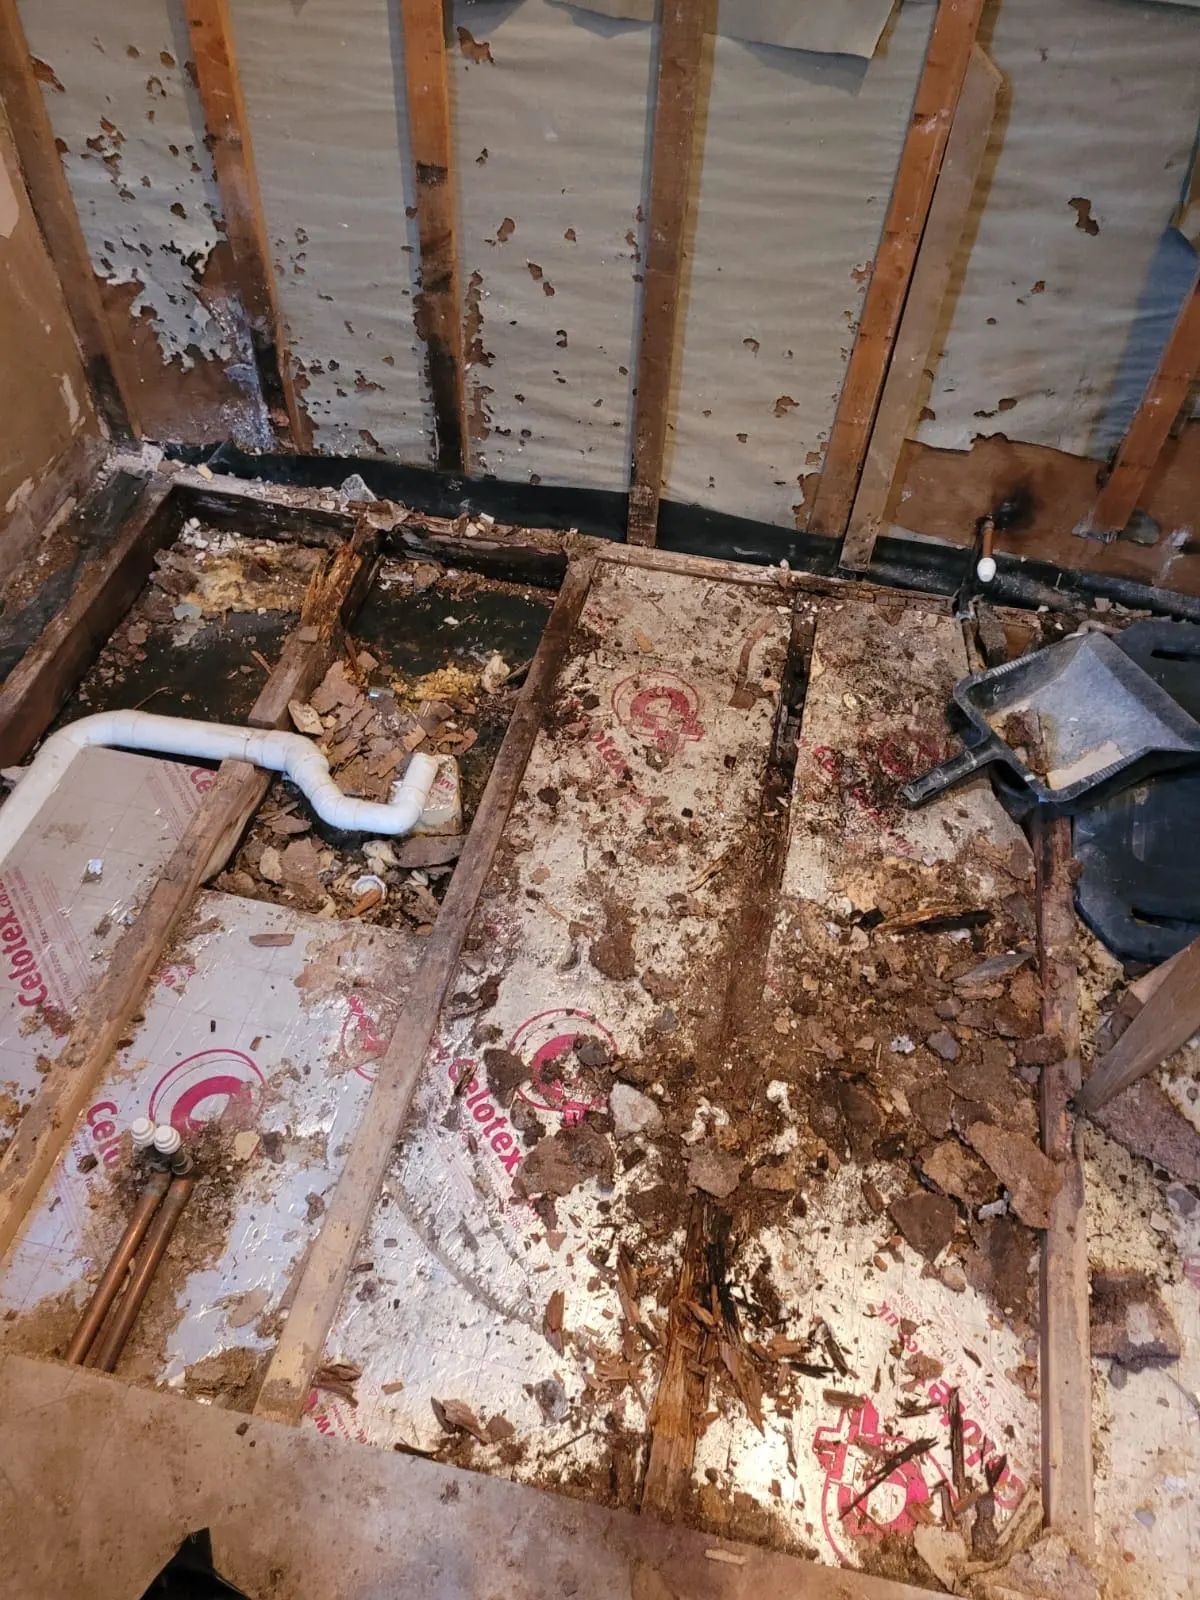
Water gets past the tile and nothing stops it. That’s the whole failure mode, and it’s slow and quiet: nothing shows on the surface for a year or two.
Without tanking, water can:
- Track along the back of the tile and into the build-up
- Reach the joists, noggins and board edges on a timber floor
- Reach the ceiling below, on an upper floor
- Let tile adhesive go, so tiles start to sound hollow
- Delaminate the subfloor, or reach the neighbour in a flat
Putting it right isn’t a repair. It’s a rebuild: tiles come off, boards come up, and the structure is dried out, usually with equipment running for days. Damaged joists are cut out and repaired, then the room is re-boarded, re-tanked, re-tiled and re-fitted.
A quick repair doesn’t cover any of that. Insurers treat long-running leaks differently from a burst pipe: a sudden escape of water is usually a claim, while slow damage from waterproofing that was never there often isn’t. Check your own policy wording before you assume you’re covered.
Why Tiles and Grout Are Not a Waterproof Layer
Tiles are waterproof. The bathroom around them isn’t, and the difference sits in everything between the two.
Grout is porous by design and passes moisture on slowly. Silicone is a consumable, because cleaning products, heat and age all shrink it and split it in the end. Buildings move, so grout lines open, and poor tile fixing leaves voids where water collects behind the tile.
Waterproof grout doesn’t solve this; it only slows water down. Tanking sits under all of it and stops it.
Signs Your Bathroom Was Never Tanked, or Has Failed
Look for water where it shouldn’t be, and don’t look for mould where you’d expect it anyway.
Genuine Waterproofing Symptoms
- Hollow-sounding or lifting tiles inside the shower
- A stain, damp patch or blistering paint on the ceiling of the room below
- A floor that has become springy near the shower when it was not before
- Silicone that keeps failing, however often you redo it
- White powdery efflorescence on the grout lines
Not Waterproofing Symptoms
- Black mould on grout and silicone
- A musty smell
Tanking sits behind the tile, so it can’t stop steam condensing on the front of it. Surface mould is almost always condensation and ventilation, so fix the extraction first, then reassess.
Any one real symptom deserves investigation. Two together usually mean water is already in the structure, and there’s no easy way to check an existing bathroom, because nothing is visible once the tiles are on. If the bathroom is recent, ask the installer for the specification; otherwise, assume it wasn’t tanked.
Does Tanking Stop Condensation and Mould?
No. Tanking and condensation are two separate problems.
Tanking stops liquid water reaching the structure behind the tile. Condensation forms on the front of the tile, on the glass, on the ceiling and on cold walls, so the membrane is nowhere near it.
Black mould on grout and silicone is a ventilation symptom, and so is a musty smell or paint peeling on a bathroom ceiling. A perfectly tanked bathroom will still grow mould if the steam has nowhere to go.
Ventilation is a separate specification with its own rules and extract rates, so ask your installer or electrician to size the extraction for the room. A humidity-sensing fan with an overrun timer is the usual answer.
Both are required, and neither substitutes for the other.
What Does Bathroom Tanking Cost in the UK?
Materials for a single shower enclosure run roughly £100 to £350 including VAT, and a full wet room sits in a different bracket altogether. The table below is materials only, excluding labour.
| Scope | Approx Tanked Area | Materials Inc VAT |
|---|---|---|
| Small splash zone | 2–4 m² | £50–£120 approx. |
| Single shower enclosure (walls plus tray perimeter) | 6–10 m² | £100–£350 approx. |
| Standard family bathroom (wet zones, not whole room) | 10–15 m² | £150–£900 approx. |
| Full wet room (membrane, former and gully) | 15–25 m² | £800–£2,500 approx. |
Every figure above is indicative: these are UK retail prices checked in August 2026, materials only, and they’re not a quotation.
What About Labour?
This is where most cost guides invent a number. Tanking labour isn’t a line item you can look up, because no authoritative UK source publishes one; it’s a fraction of a fitter’s time, folded into the tiling quote.
As a trade estimate rather than a manufacturer figure: a shower enclosure is typically part of a day, and a full wet room typically adds a day or two. Both vary by fitter and by room.
Ask your fitter to itemise tanking separately on the quote. Naming the system, the area and the tapes takes a minute, and it tells you more about whether the work is being done properly than any price guide will.
Bathroom Tanking Regulations in the UK: What Actually Applies
No Building Regulation in England requires you to tank a bathroom. That’s the starting point, and most articles online get it wrong.
What Do the Building Regulations Actually Say?
The relevant hook is Requirement C2(d) of Schedule 1 to the Building Regulations 2010. Floors and walls must protect the building and its users from harmful effects, and one named effect is spillage of water from or associated with sanitary fittings or fixed appliances.
That’s a performance requirement: it says what the outcome must be, but it does not say how to achieve it. Approved Document C is the statutory guidance sitting under C2, and it gives no guidance on tanking, membranes or wet zones. That’s worth saying plainly, because plenty of content online implies otherwise.
What Do the British Standards Say?
BS 5385-1:2018 is the code of practice for internal wall tiling in normal conditions. Its own scope hands shower areas and wet areas to BS 5385-4:2015, which covers tiling in specific conditions.
Both are codes of practice, which means best practice rather than law. A tiler who ignores them hasn’t broken a regulation, but they have departed from the recognised standard of workmanship, and that matters if there’s ever a dispute.
One change there is worth knowing: BS 5385-1:2018 removed plywood and wood-based boards as acceptable for direct tiling.
New Homes With an NHBC Warranty
NHBC Technical Guidance Note 9.2/06 applies to homes whose foundations began on or after 1 January 2025. It requires a tanking system in all wet rooms and in higher-flow showers, and the system must be third-party certified, with all junctions sealed: wall to tray, wall to bath, wall to floor, and pipe penetrations.
This is a new-build warranty condition. It is not a rule for refurbishments. If you’re refitting an existing bathroom, NHBC doesn’t apply to you at all.
For the regulations that do apply across a UK bathroom project, see our guide to UK bathroom regulations.
Can You Tank a Bathroom Yourself?
Yes, on a simple shower enclosure, as long as you follow one manufacturer’s system exactly.
DIY Tanking
What works:
- • Kits from Mapei and BAL are sold for exactly this job
- • On a small enclosure with a sound backer board and a standard tray, the work is within reach of a careful DIYer
- • Materials are the cheap part of the job
What goes wrong:
- • Rarely the flat surfaces
- • It’s the corners, the tray junction, the pipe collars and the film thickness, and those four details are where nearly every failure starts
Hand It Over For
- • Wet-room floors: formed falls, a bonded drain and a lapped floor-to-wall membrane
- • Timber floors: a system rated for movement
There’s a guarantee question too. Some manufacturers only extend a system warranty when an approved installer does the work, so check before you buy rather than after.
Verdict: Can I Tank My Bathroom Myself?
Yes, on a simple shower enclosure with a sound backer board and a standard tray. Wet-room floors and timber floors are not first-attempt jobs. Bowman Bathrooms specifies the tanking system as part of the design, and the work itself is carried out by your own fitter or by one of our approved installers. Our guide to how installation works covers that model in detail.
Common Tanking Mistakes (and How to Avoid Them)
Good products still fail when the detail is wrong, and these are the faults that come up again and again.
1. Skipping Surface Preparation
A membrane has to bond, and dust, oil, flaking paint and loose board all stop it happening. Clean and stabilise the surface first.
2. Applying It Too Thin
This is the most common fault of all. Liquid membranes have a stated dry thickness and a stated coverage rate, so roll out the right kilograms per square metre and never judge the film by eye.
3. Missing the Corners, Junctions and Pipes
Water finds the joints rather than the middle of the wall. Every internal corner needs tape, and every pipe needs a collar.
4. Tiling Too Early
There’s no universal cure time: some sheet systems tile immediately, while Mapegum WPS wants 12 to 24 hours. Check the product rather than a rule of thumb.
5. Mixing Brands
Tapes, collars, corners and adhesives should come from the same system as the membrane. Mixing them is the fastest way to lose the guarantee.
6. Siliconing the Tray Junction Instead of Sealing It
Silicone is the finish. The manufacturer’s sealing band is the waterproofing.
7. Treating 300mm Past the Enclosure as a Standard
It’s a trade habit rather than a published figure. Follow the manufacturer’s instruction instead.
Final Tip: Trust the System
Bathroom tanking is a system, not a product. Skipping a detail, mixing brands or rushing the cure time causes almost every failure on this list, and proper prep, technique and quality materials always pay for themselves.
Which Tanking Systems Are Used in the UK?
Six systems cover most UK bathrooms, and each is a complete system with matching tapes, collars and corner pieces.
BAL Waterproof 1C
Liquid, from Building Adhesives Ltd. Tile after 2 hours at 20C, one coat on walls and two on floors, at 0.8mm dry on walls and 1.6mm on floors. Lists plasterboard, ceramic, quarry tile, terrazzo and natural stone as substrates, without priming.
Mapei Mapelastic AquaDefense
Liquid. Second coat 1 hour after the first, then tile 4 hours after the second, at +23C. Can be applied over existing ceramic, terrazzo and stone with the right preparation.
Mapei Mapegum WPS
Liquid. 0.5mm dry minimum, roughly 1.2 kg per square metre over two coats, and 12 to 24 hours before tiling. Slower than the rest, but long proven.
Schluter-KERDI
Bonded sheet, 0.2mm, with no cure time at all, so you tile once the bonding mortar has set. Wall-to-tray connections are waterproofed with KERDI-BAND.
Impey WaterGuard
Self-adhesive butyl sheet, 1mm, with no cure time, so you can tile immediately. Kits include jointing tape and pre-formed corners.
wedi Building Board
Waterproof XPS-cored board, with no membrane over the face. Joints, corners, fixings and perimeter are sealed with wedi 610 sealant and reinforcement tape.
Choosing the Right System
It comes down to four things: your substrate, whether it’s an enclosure or a wet room, how soon you need to tile, and whether you want a single-manufacturer guarantee. That guarantee is usually worth having.
Frequently Asked Questions
Common questions about bathroom tanking and waterproofing
Still got a question we haven’t covered? Come and put it to one of our designers in the showroom.
Get the Waterproofing Specified Before Anything Is Ordered
Tanking is a design decision rather than a site decision. The system has to suit the substrate, the tray or former, and the tile you’ve chosen, so agree it on paper and your fitter isn’t making that call on the day. Design comes as part of every Bowman Bathrooms project; you only pay for the products you pick.
Related Guides and Inspiration
Wet Room vs Walk-In Shower
Which configuration suits your bathroom, and what the cost difference actually is
UK Bathroom Regulations 2026
The rules that do apply to a UK bathroom project
Wet Room Cost UK
What a tanked, level-access wet room costs by spec in 2026
Wet Room Former vs Shower Tray
Which one your floor build-up and drain position actually allow
How a Bowman Project Runs
From first appointment to final sign-off
Completed Bathroom Projects
Wet rooms and shower rooms built across Essex
Shower Niche Guide
Size, height, tile set-out and how to waterproof a recess