Bowmans · Inspiration · Design
How to plan a luxury bathroom: a designer’s 14-step checklist
Most luxury bathroom projects fail at planning, not at install. The fitter gets the blame for products that do not fit, taps that dribble, soil pipes in the wrong place, joists that flex under a freestanding bath, and tiles that do not work in the light the room actually has — but every one of those is a planning mistake. This is the checklist we run on every project: 14 ordered steps, what to do at each, and the common mistake to avoid. Print it, take it to whichever showroom you are talking to, and use it to test the conversation.

01 · The brief
Define the brief in writing before you look at any product
The brief is a written document that captures how the bathroom needs to work for the people using it. Not what it looks like — that comes later. Written briefs change the conversation with every showroom you walk into, because a designer with a real brief in front of them works differently from one selling out of a brochure.
What to do. Write down: who uses the bathroom (heights, ages, mobility, anyone bathing children); how many people use it morning and evening; whether it needs a bath at all (Houzz UK’s 2025 Bathroom Trends Study reports 58% of UK homeowners enlarged the primary shower in renovation, 25% of them by more than 50%); your storage reality (how many towels, what cleaning products, hairdryer/straighteners); the room’s role (family bathroom, ensuite, principal-suite spa, guest); your budget range; your timeline including any hard dates (a baby due, a remortgage, a sale).
The common mistake. Starting with a Pinterest moodboard. Pinterest tells the designer what you find pretty, not how the room needs to perform. A good designer translates the brief into product choices that produce something you find pretty and functional. Reverse the order and you get a beautiful room that does not work for the way you live.
The brief is the only document the designer should be working from when they propose layout. If they start drawing without one, slow them down.
02 · The survey
Measure the room properly — floor, ceiling, openings, services
A bathroom is a 3D problem, not a floor plan. The number of products that fit on paper but not in the actual room is the single most expensive surprise on a luxury install. Most surprises trace back to one of three measurements that nobody took.
What to do. Measure floor plan width and length wall-to-wall. Measure ceiling height at the lowest point (sloping ceilings dictate which rainfall shower heads will fit — a head with a 30cm projection on a 2.0m ceiling reaches a 1.95m user). Note window cill height and door swing direction. Photograph where the soil-stack waste pipe currently exits the WC wall — relocating it costs £1,500–£3,000 in plumbing rework. Note the existing radiator’s plumbing run (off the bathroom feed or off the central-heating loop). Measure the depth of any wall the basin or wall-hung WC will fix to — concealed cisterns need around 200mm wall depth and many UK stud walls give you 100mm.
The common mistake. Trusting the original architect’s floor plan. Walls are rarely square, ceilings are rarely flat, and 1930s and earlier properties drift several centimetres across a 3-metre wall. Bring a laser measure (a Bosch GLM at £60 is fine), measure the diagonals as well, and note the deviation. A designer working from your real numbers can plan to the millimetre; one working from the architect’s drawing will plan to a room that does not exist.
03 · The water system
Survey the water system and the actual pressure at the bathroom
This is the survey that prevents the most expensive single mistake in luxury bathrooms. The pressure at the existing bath tap dictates which taps, valves and shower heads will work in the room you are about to build. Get this wrong and you find out post-install, when the new monobloc dribbles or the rainfall head trickles.
What to do. Identify the system: gravity-fed (loft tank, low pressure, typical of older properties), unvented mains-pressure (no tank, mains pressure, typical post-2000s), or a megaflow / accumulator system. Get a pressure reading at the existing bath tap with a £20 plumbers’ merchant pressure gauge — 2 bar+ is comfortable for almost any modern fitting; 1–2 bar limits some monoblocs and rainfall heads; below 1 bar you are looking at a dribble unless you fit a shower pump (around £400–£800 plus install, with its own noise, warranty and energy implications). Check the hot-water cylinder type: unvented hot-water systems above 15 litres require a registered competent person to install or alter, per Approved Document G3.
The common mistake. Choosing a tap before checking the system. Mumsnet renovation threads are full of people who fitted a beautiful Italian monobloc to a 1930s gravity loft and got 0.4 bar. The fix is either a pump or a return-and-reorder cycle, both of which cost £400–£1,500 and weeks of delay. Hansgrohe publishes minimum pressure ratings on every product spec sheet; so does Crosswater. Read them.
04 · The structure
Check joist direction and floor load before you fall in love with a freestanding bath
A 1700×750mm cast-iron freestanding bath weighs around 100kg empty and 350–400kg filled with a person in it. UK timber upper floors built to current standards are designed for a residential imposed load of 1.5 kN/m² per BS EN 1991-1-1, and a freestanding bath concentrates that load over roughly 1.3m². For most modern properties the floor takes it. For some older or compromised floors, it does not.
What to do. Lift a floorboard or look from below. Note joist direction (parallel to or perpendicular to the bath’s long axis), joist size (minimum 47×195mm in modern construction; 47×145mm or smaller in 1930s and earlier properties), span between supporting walls, and any notch damage from previous plumbing runs (notches in the bottom third of a joist seriously reduce its capacity). Joists running parallel to the bath with no double-up underneath are the worst combination — the load transfers through one joist instead of three or four. If anything is borderline, a structural engineer’s sign-off is £200–£500 and protects against a flex-and-crack outcome.
The common mistake. Buying the bath on Instagram aesthetics, then building blocking under the floor as an afterthought when the bath turns up. Acrylic and stone-resin freestanding baths weigh a fraction of cast iron (30–60kg empty, 250–300kg filled), so the cheapest fix when the floor is light is to switch material. Decide structure before product, not after.

05 · The bath decision
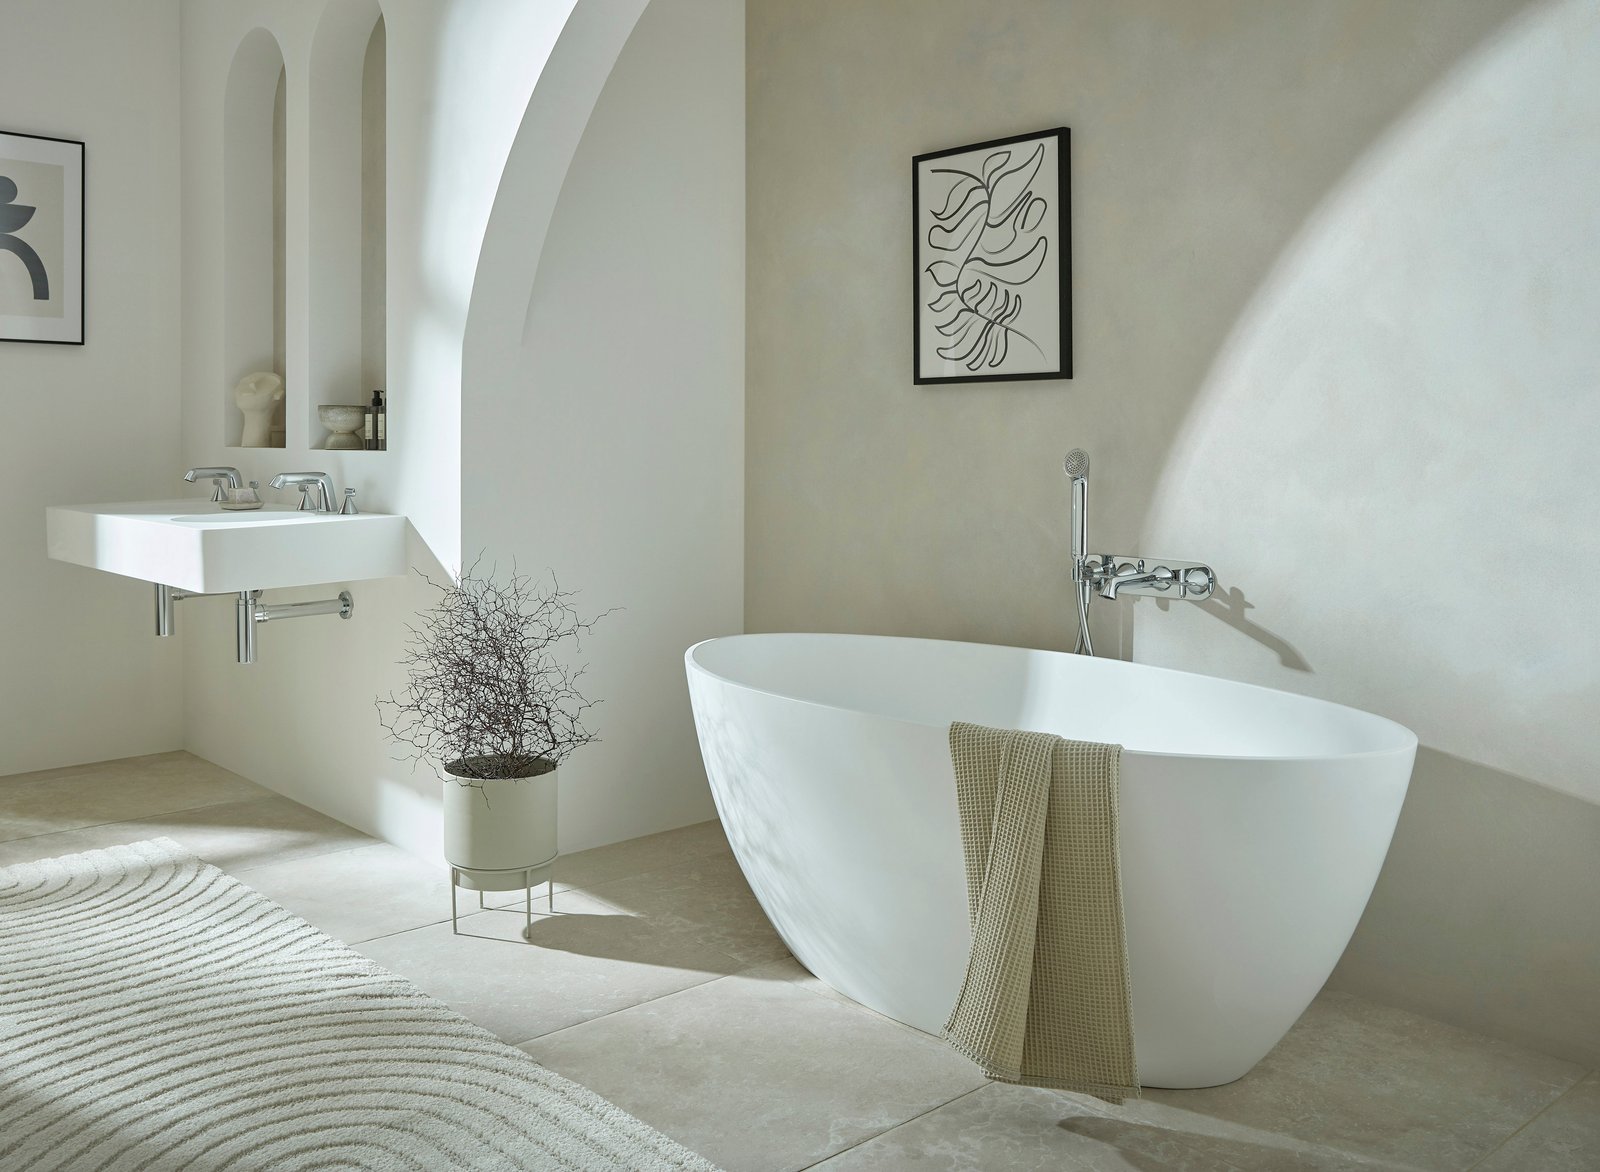
Decide bath type first — it locks half the layout
Bath choice is the structural decision the rest of the room arranges itself around. Built-in or freestanding, single-ended or double-ended, materials, fill method — each choice constrains where the basin, WC and shower can sit. Make it first. Other product choices follow.
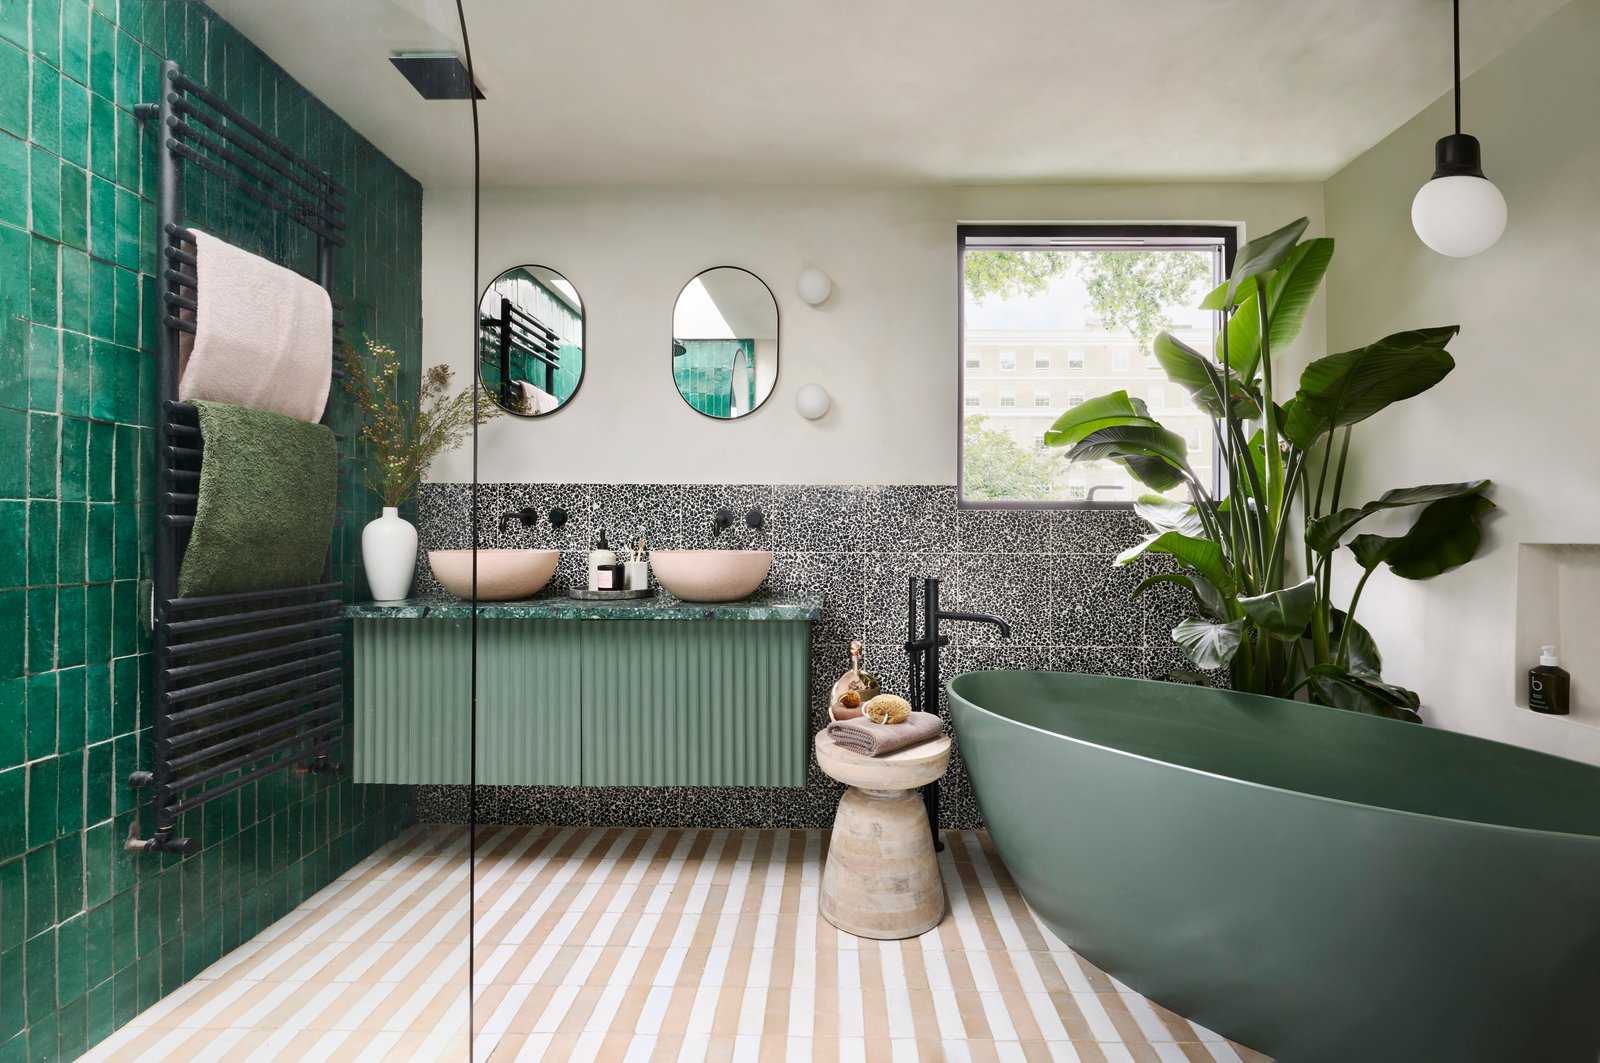
What to do. Pick a category before a product. Built-in baths give you a tile shelf, more storage, and lower install cost; they read traditional or transitional. Freestanding baths read luxury immediately but eat 40–60cm of floor space on each side for cleaning and bathing comfort, and their fill route is from the floor (concealed plumbing under the floorboards) or wall (a floor-mounted bath-shower mixer like the BC Designs Cheviot adds another statement piece). Double-ended freestanding baths read most luxurious; single-ended are usually cheaper and fit better against a wall. Material affects weight (covered above), heat retention (cast iron and stone resin hold heat longer than acrylic), and cost.
The common mistake. Trying to fit a freestanding bath into a room that does not have the floor space for it. The bath looks beautiful in the brochure photo at full distance; in a 4m² ensuite with the freestanding bath crammed against a wall, the room reads cluttered and the bath impossible to clean around. Below 5m², a built-in bath almost always reads better; a walk-in shower plus no bath is often the right answer in an ensuite.
06 · The tile decision
Choose tile in the actual room light, not under showroom spotlights
Tile choice is the second-most-expensive thing to get wrong, after the bath. Showroom lighting is bright, neutral and even; your bathroom probably is not. A pale grey tile that reads ivory under showroom LEDs reads green under north-facing daylight and blue under warm evening LEDs at home.
What to do. Get full sample tiles, not the postcard chips. Bring them home. Look at them at 9am, 3pm and 9pm in the actual room, against a swatch of the wall colour and the vanity finish. Photograph each. Note any colour shift. Slip rating matters too: floors in wet zones should be R10 minimum (BS EN 14411 / EN 13036-4 classification); shower trays and walk-in shower floors are happier at R11. Black grout looks good for six months and shows white limescale residue worse than the original tile after that — it is the most-regretted choice on Mumsnet renovation threads. Light-grey or pale-cream floor grout stains visibly within a year if the bathroom sees children. Mid-grey grout in a sealed-fast formula is the durable middle ground.
The common mistake. Choosing a textured wall tile in a hard-water area. Fine-textured zellige and crackle-glaze surfaces pick up limescale that no glass cleaner removes. Smooth glazed porcelain and large-format polished stone are the easier living-with finishes in Essex and the East of England, where water hardness sits in the 250–350 mg/l calcium carbonate range.
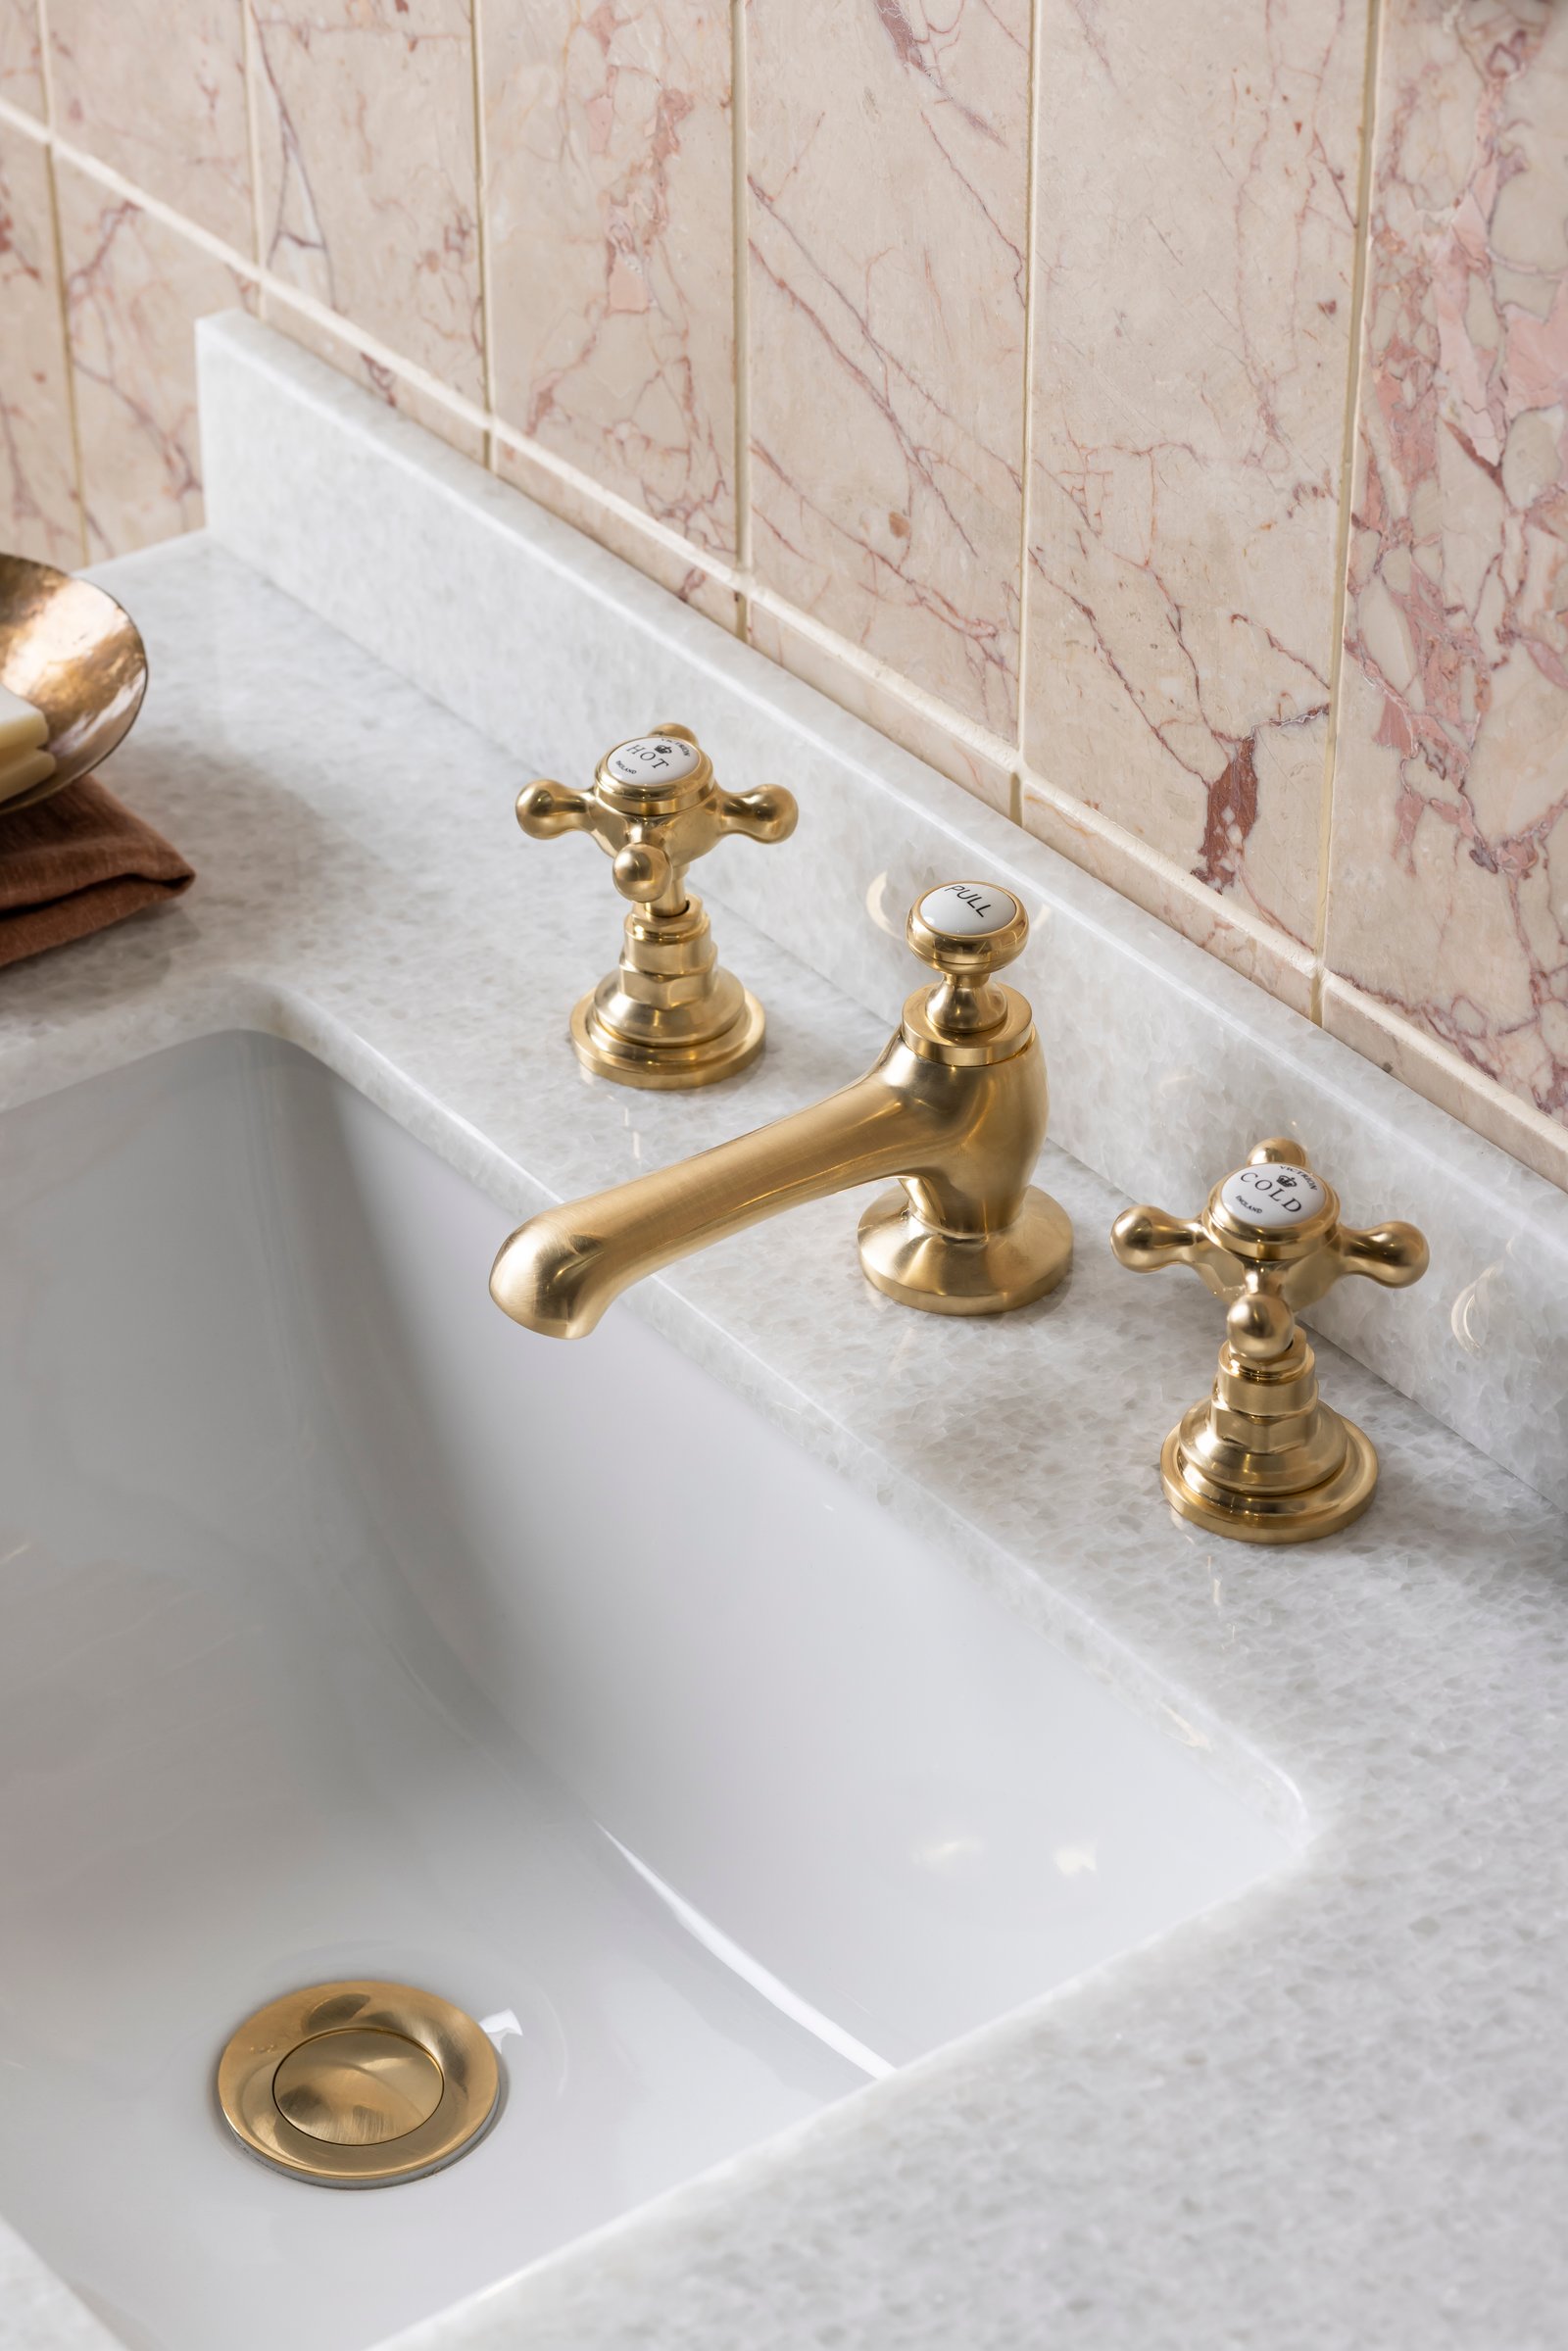
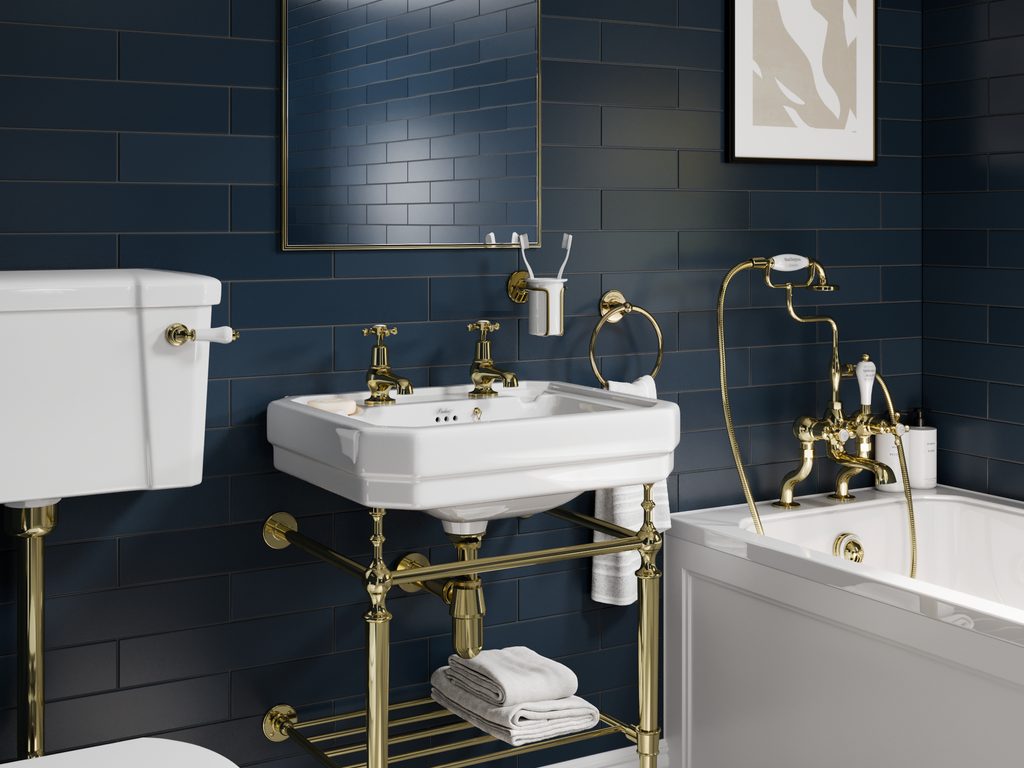
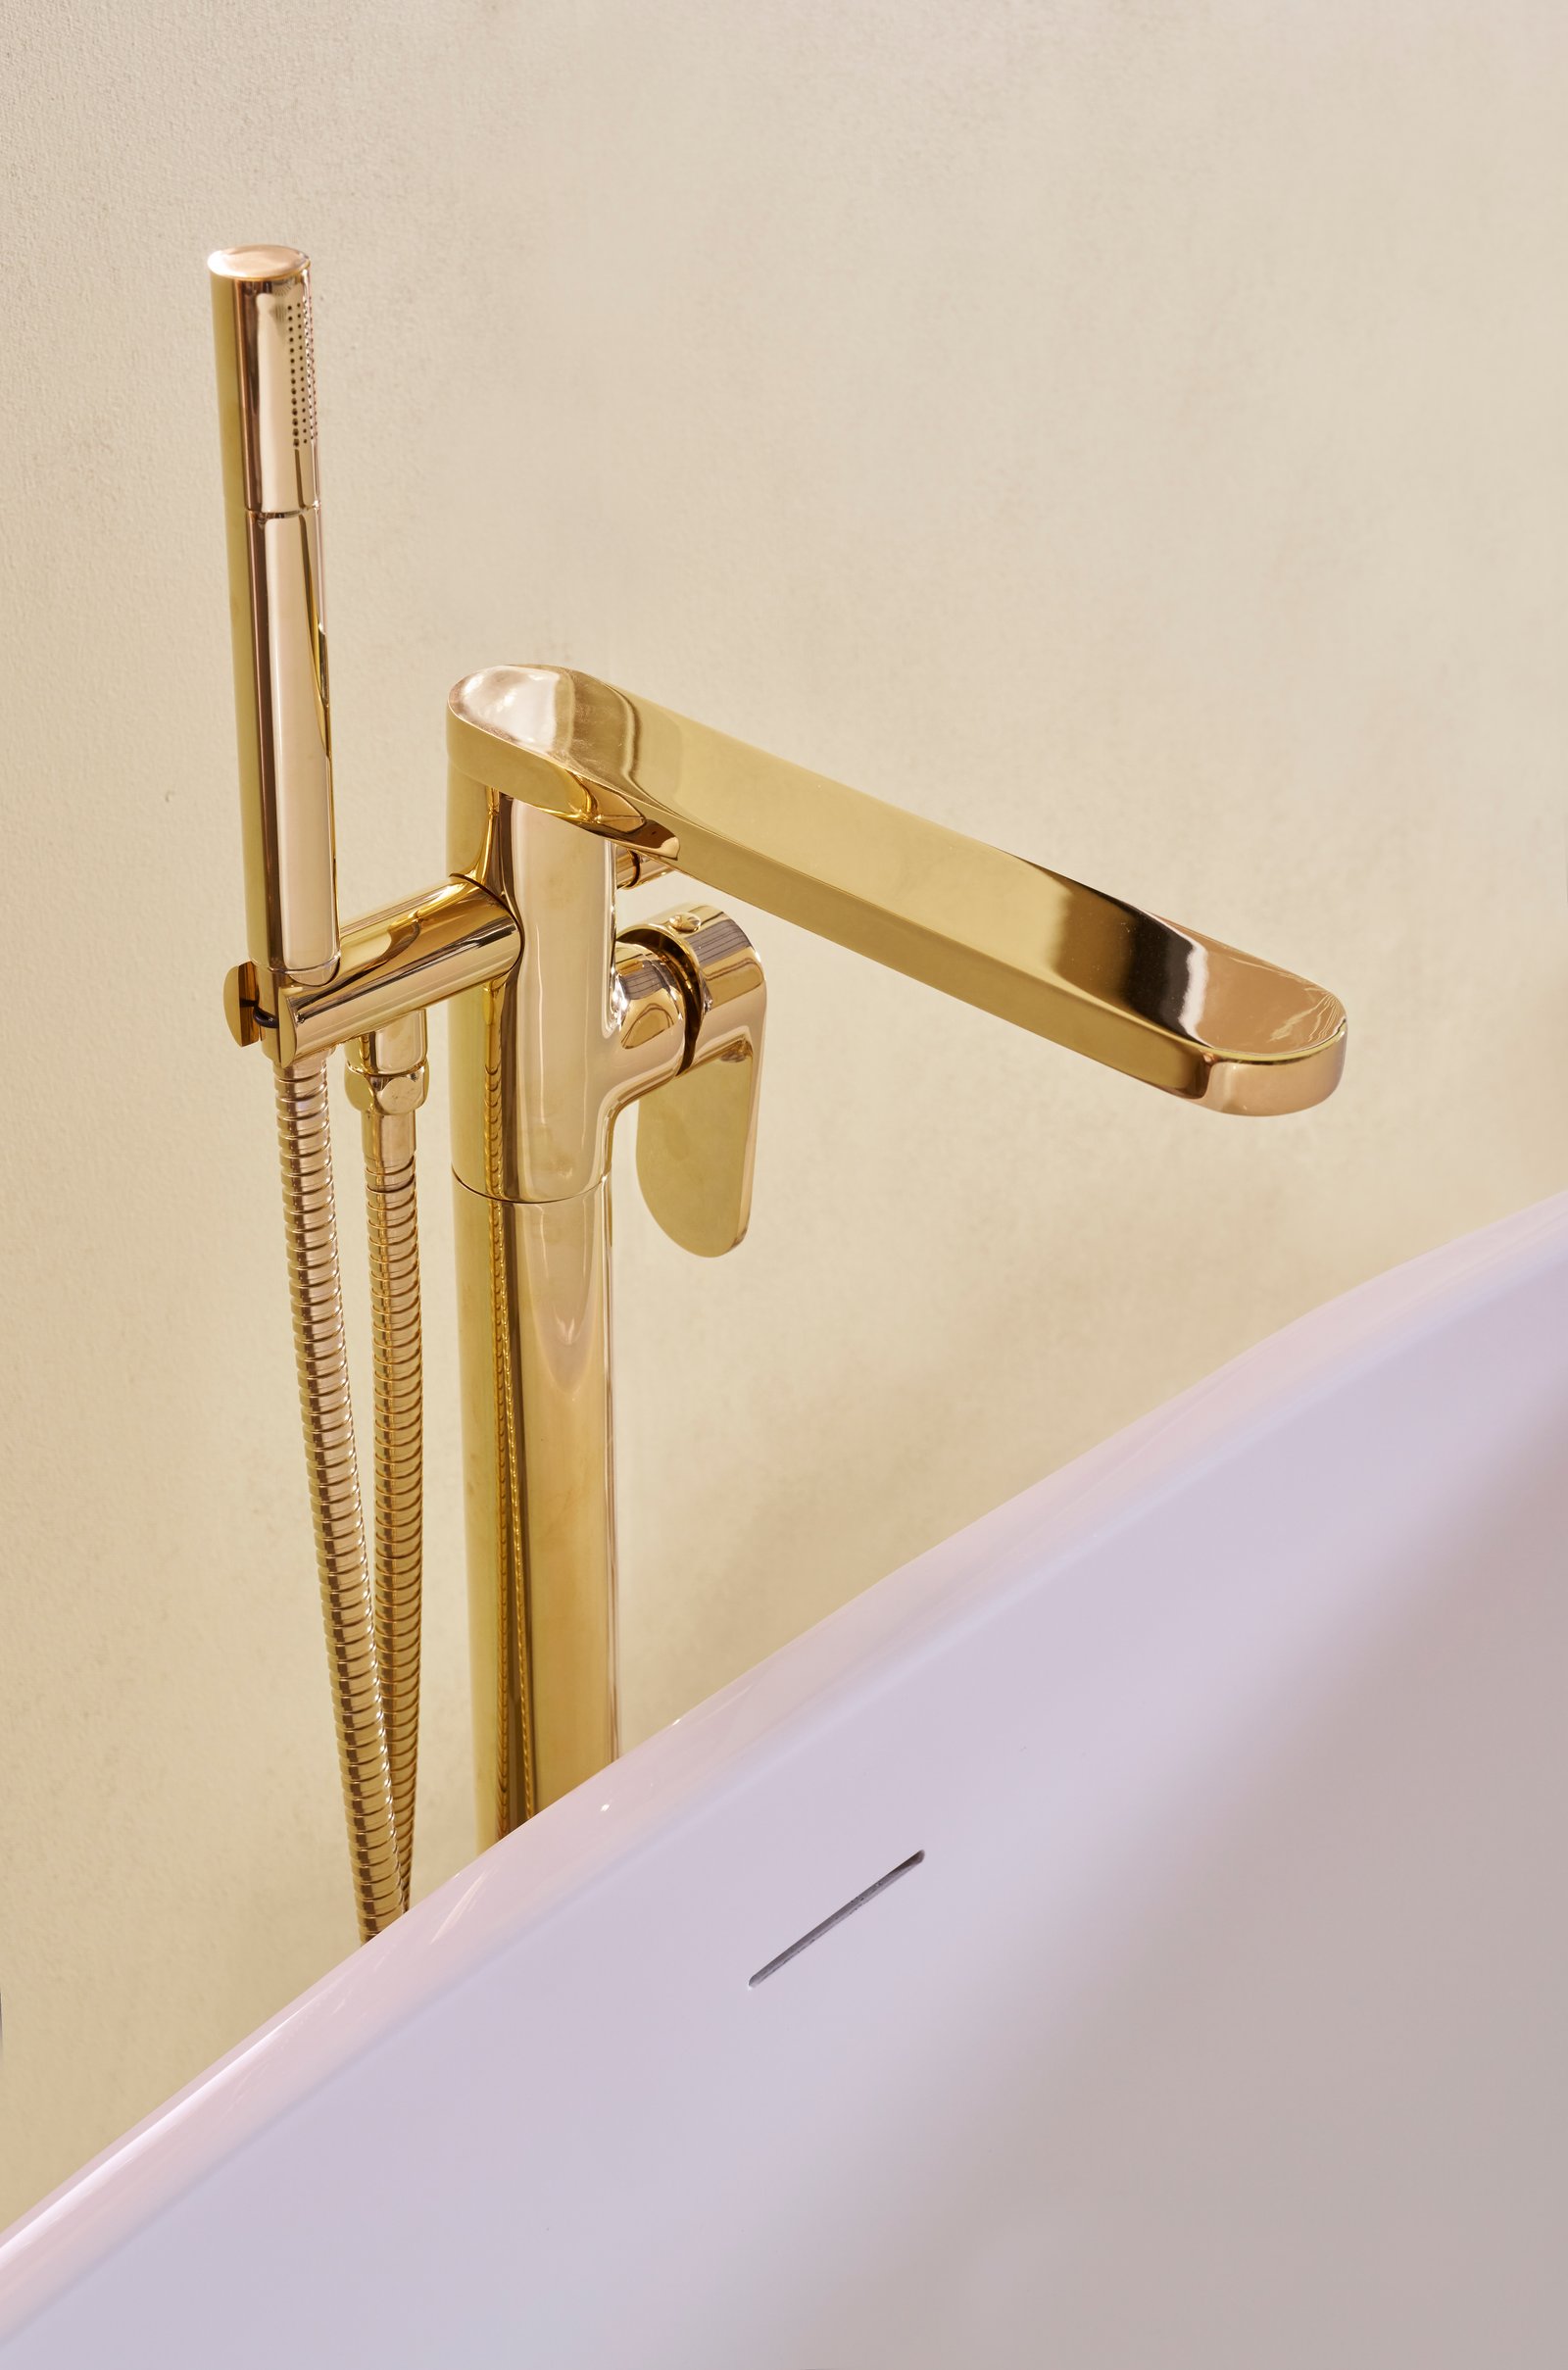
07 · The brassware decision
Spec brassware to match the water system, finish family and lead time
Brassware is where finish coordination begins. Every visible metal in the room reads as one family or as a clash — tap, shower head, towel rail, mirror frame, vanity handle, light fittings. Get this consistent at planning stage and the room reads coherent for ten years. Get it wrong and the eye trips on every cold-warm jump.
What to do. Pick a finish family first: chrome, matt black, brushed nickel, brushed brass, or aged bronze. Then check three things on every brassware product spec sheet. (1) Minimum operating pressure — covered in step 3, but worth re-confirming on each piece. (2) Lead time — chrome and matt black usually ship within a fortnight; brushed nickel, PVD bronze and aged brass can take 8–14 weeks and add 15–25% to list price. (3) Outlet flow rate, particularly on basin taps — some European spec basin mixers run at 5 l/min flow restriction (good for water efficiency under Approved Document G2’s 125 L/person/day target), others at 8–9 l/min (faster fill, slightly higher water bill). UK 2026 trend data from kbbfocus has BC Designs design manager Keeley Sutcliffe noting that “brushed nickel gives you the neutrality of chrome without the coldness” — brushed nickel and brushed brass have been the rising finishes through 2025 and 2026.
The common mistake. Mixing finish families to “save money on the bits no one sees”. The towel rail in chrome when everything else is brushed brass; the WC flush plate in white when every other metal is bronze. Coherence costs nothing extra at planning — you just buy the rail in the right finish — but is impossible to fix once products are on site.
08 · The lighting plan
Build a layered lighting plan, not a row of downlights
A single line of cool-white LED downlights is the default in builder-spec bathrooms. It produces the worst possible light for both functional tasks (shaving, makeup, reading shampoo bottles) and atmosphere (a 7am bath should not feel like an operating theatre). Layered lighting is what separates a luxury bathroom from a hotel chain.
What to do. Plan four layers. (1) Ambient — a few warm-white (2700–3000K) downlights for general fill, dimmable. (2) Task — mirror lighting at face height (vertical LED strips on either side of the mirror, or a backlit mirror); ceiling downlights are the wrong source for shaving because they cast a shadow under the brow. (3) Accent — under-vanity LED strip, a niche-light in the shower, a wall sconce next to a bath. (4) Mood — a separate dimmer circuit on the lowest layer, or a colour-tunable fixture for evening soaks. All bathroom fittings must be IPX-rated to the zone they sit in (covered in step 10) and on a 30 mA RCD-protected circuit per BS 7671:2018 + Amendment 3:2024.
The common mistake. Treating lighting as an electrician’s afterthought instead of a designer’s spec line. The fitter knocks holes for downlights on day three of the install based on what looks even from below; you live with that pattern for the next decade. Plan the lighting on paper, with circuits, dimmer groupings and IPX ratings, before the electrician arrives.
09 · The ventilation
Specify ventilation to Approved Document L — not optional
Bathroom ventilation is the unglamorous specification line that protects every other product in the room from premature failure. Damp from inadequate extract corrodes brassware, lifts paint, swells timber vanities, blooms grout, and feeds black mould in the worst silicone joints. Approved Document L (Conservation of fuel and power) sets the minimum.
What to do. Specify either intermittent extract at 15 litres per second or continuous extract at 8 litres per second, per Approved Document L Volume 1 (2021 edition with 2023 amendments). The fan must be ducted to outside — not into a loft, not into a soffit, not into a stud-wall void. In bathrooms with no openable window, run-on time of at least 15 minutes after the light goes off is required. For higher-end specifications, a humidity-tracking fan (e.g. Vent-Axia models that increase extract rate as humidity rises) handles a long shower better than a fixed-rate extract on a timer. Quiet-rated fans (sound output below 25 dB(A) at 3m) are worth the £50–£150 premium — cheap fans get switched off and never replaced.
The common mistake. Reusing the existing fan because “it is only six years old”. The existing fan was specced for a smaller bathroom in worse use. Recheck against the 15 L/s rule for the new room volume, not the old one. Wetrooms and walk-in showers in particular need extract sized for the moisture they generate, not for the floor area on plan.
10 · The electrics
Get electrical zoning right — BS 7671:2018 + Amendment 3:2024
Bathroom electrics are the most regulated part of any luxury bathroom, and the area where a non-Part-P installer’s shortcut puts you on the wrong side of the law and the wrong side of your home insurance. The current rules are BS 7671:2018 + Amendment 3:2024 (in force from 31 July 2024), referenced by Approved Document P.
What to do. Map the zones on plan before you specify any fitting. Zone 0 is the inside of the bath or shower — IPX7 minimum, SELV 12V max only. Zone 1 is the area above the bath or shower up to 2.25m from the floor — IPX4 minimum. Zone 2 is 0.6m horizontally beyond Zone 1 — IPX4 minimum. (Zone 3 was removed from the regulations and old guidance still circulating online is out of date.) Every bathroom circuit must be on 30 mA RCD protection. Notifiable bathroom electrical work must use a Part-P registered competent person or be notified to building control. Plan socket positions, mirror-light zones, towel-rail switching and underfloor-heating thermostat outside Zone 2 wherever possible.
The common mistake. Letting a fitter run cables and decide IPX ratings on site. The product the homeowner wanted may not be IPX-rated for the zone the fitter cut a hole in. The fix is either a different fitting (extra spec change, lead time) or a different position (different aesthetic). Plan the electrics with the bathroom designer at the table, not as a fitter’s site decision.
11 · The finish coordination
Coordinate every finish across every product — the moodboard test
Finish coordination is what separates a luxury bathroom from a high-spec one. A high-spec bathroom is the right products bought independently; a luxury bathroom is the right products bought as a coherent palette. The difference is the moodboard: the physical sample tray of every finish in the room, viewed together before order.
What to do. Build a physical moodboard, not a Pinterest one. Pull the actual tile sample, the actual brassware finish swatch, the actual paint card, the actual vanity finish chip, the actual stone or quartz worktop sample, the actual grout colour, and the actual silicone colour. Lay them on a tray, photograph them in the bathroom’s actual light at 9am and 9pm, and look at them together for a week. Coloured suites are the trend that exposes weak coordination fastest — Catalano Carolina green or sabbia, BagnoDesign Studio 316’s eight colours, Roca Ohtake. They look stunning on the brochure photo where every other surface has been lit to flatter them; in your room, they are unforgiving.
The common mistake. Coordinating from photographs alone. Photographs lie about colour. The same matt-black tap photographed against three different walls looks three different shades of grey. Physical samples in physical room light are the only reliable test. Designers do this as standard; fitters and DIY routes skip it.
12 · The specification
Lock the full specification sheet — product codes, quantities, lead times
The specification sheet is the document that turns a moodboard into a buildable project. Every product, every finish, every quantity, every supplier, every lead time, every delivery address, every install note. A standard luxury bathroom sits at 60–90 line items on the spec sheet; a bespoke principal-suite ensuite can run to 150.
What to do. Get a complete spec sheet in writing before you sign anything. Each line should carry: manufacturer name, product name and code, finish, dimensions, quantity, unit price, line price, lead time, supplier and a note flag for any pressure rating, IPX zone or compatibility constraint. The grout colour and silicone colour are line items, not afterthoughts. The tile waste percentage (usually 10–15% on rectangular layouts; 20%+ on herringbone or chevron) is a quantity adjustment, not an optional extra. Check the line for “additional fixings, brackets and accessories” — concealed cisterns, basin trap kits and waste plates are often forgotten.
The common mistake. Accepting a quote that summarises rather than specifies. “Brassware: Crosswater package £3,200” is a summary; it is not a spec. The fix is asking for line-by-line. Any showroom that resists giving you the line detail before order is a flag — the detail is exactly what you are paying for. The cost reality across the £15k, £25k and £40k tiers is broken down further in our luxury bathroom cost UK guide.
13 · The render review
Review the 3D render properly — not the pretty version
A 3D render is a verification tool, not a marketing tool. The job at this stage is to catch the things that look fine on plan but read wrong in three dimensions. Door swing into a vanity. A towel rail that blocks an opened window. A mirror that reflects directly into the WC. A pendant light hung exactly where someone drying their hair will hit it.
What to do. Walk through the render in three modes. (1) Functional — trace your morning routine: WC, basin, shower, towel, mirror, exit. Is anything in the way? (2) Sightline — what do you see when the door opens? What does a guest see? Is the WC the first thing in view from the landing? (3) Lighting and reflection — where does daylight fall at 9am? Does the mirror cast a glare into the bath? Where does the towel-rail cast shadow? Ask the designer to render the room at 9am, 3pm and 9pm light if the software supports it.
The common mistake. Treating the render as a brochure. The first render is usually styled to look beautiful — warm lights on, towels folded, dramatic angle. That is the version that sells the design; it is not the version that catches problems. Ask for the unstyled render with overhead light only, plan-view drop-down to verify the layout, and a clean section view to see the heights. Three or four revision rounds at this stage is normal and prevents change orders during install.
14 · Sign-off and order
Sign off in writing, then order, then strip
The last step is the simplest and the one that prevents the most expensive failure mode of all: starting strip-out before products are on site. A stripped bathroom with no products is a money meter running at £30–£60 per pallet per week in storage, plus accommodation, plus the family-of-four-bathing-elsewhere logistics, plus the reorder cycle if anything turns up wrong.
What to do. Sign off the spec sheet in writing — literally a signed PDF with the full line-by-line attached. Place all orders. Wait for delivery (6–10 weeks for European vanities and stone slabs; 8–14 weeks for special-finish brassware). When products arrive on site and have been QA-checked against the spec sheet for damage and correctness, then brief the installer to strip and start. The fitter never works on faith that “the bath should be here next week”; the bath is in the room before the floor comes up. Site management visits during install (typically £60–£100 per visit) catch the small spec deviations before they become bigger ones — ask whether they are included or charged separately.
The common mistake. Letting an enthusiastic installer start strip-out “to keep momentum” while products are still 4 weeks out. The bathroom sits stripped for those 4 weeks. The family bathes at the in-laws or a temporary shower in the kitchen. One product turns up wrong and the wait extends to 6–10 weeks. The cost of that timeline slip dwarfs anything you saved by starting early. Order, deliver, then strip — in that order, every time.
Whether your specific project warrants a designer-led process or you can run the checklist with a fitter is covered in our is a bathroom designer worth it guide — specifically the four trigger conditions (£15k+ budget, awkward layout, period property, 3D render requirement). Ticking two of the four is usually the threshold; below it, this checklist still applies but a competent fitter and a tight Pinterest board can replace the formal designer step.
Frequently asked questions
Everything UK homeowners ask about planning a luxury bathroom in 2026.
What is next
Run the checklist with a designer
We run this checklist on every project. The first showroom appointment is free, with no obligation to buy. We benchmark our product pricing against the major UK online retailers (Drench, Victorian Plumbing, the supplier-direct sites) on every brand we sell, so the design service comes alongside the product price, not folded into it. If you would rather get a feel for the numbers yourself first, our interactive price guide walks through the spec in your own time. The honest test for any showroom you consider: ask how their pricing compares to the major online retailers. If the answer is vague, the design is not really free.
We design from showrooms in Braintree (Springwood Industrial Estate, CM7 2YN) and Leigh-on-Sea. There is no design fee, no margin uplift on products, and no obligation. We ask clients to be seriously planning a project before we book designer time, since we do not recover the cost through your basket.
Companion guides: is a bathroom designer worth it? · luxury bathroom cost UK 2026